
Add users to your company with different permissions
XCEED Pro lets you control exactly what each team member can see and do. This article explains the different permission levels so you can give your team the right access without losing control.
1. How permissions work in XCEED Pro
Permissions in XCEED Pro are assigned per user and define:
What areas of the dashboard they can access
What actions they can perform (view, edit, manage, or export)
Whether they can manage sensitive data like finance or users
Each user must be linked to a company, and permissions apply across all venues and events under that company.
1.1 Admin permissions
Admins have full access to XCEED Pro.
They can:
Manage company settings
Create, edit, and delete venues
Create and manage events
Manage ticket types and prices
View financial data and reports
Invite, edit, and remove users
Best for: company owners, main promoters, or senior team members.
1.2 Manager permissions
Managers can run events but don’t control the company structure.
They can:
Create and manage events
Edit event details and ticket types
Access guestlists and door tools
View sales performance (without full financial control)
They cannot:
Edit company settings
Manage users
Access sensitive payout or contract information
Best for: event managers, venue managers, or production leads.
1.3. Staff permissions
Staff permissions are limited to on-the-ground operations.
They can:
Access door lists
Scan tickets
Manage guestlists on event days
They cannot:
Edit events or tickets
View sales or financial data
Access company or venue settings
Best for: door staff, guestlist managers, and temporary collaborators.
1.4 XCEED ACCESS Permission
The XCEED Access allows user to scan tickets at the door and authorise your guest to go in. Only users with Admin, Door Director, Door manager and Operations Director roles can login to the app
2. Assigning the right permissions
To add a new user:
Go to Settings in XCEED Pro
Open ManageUsers

Click on Add
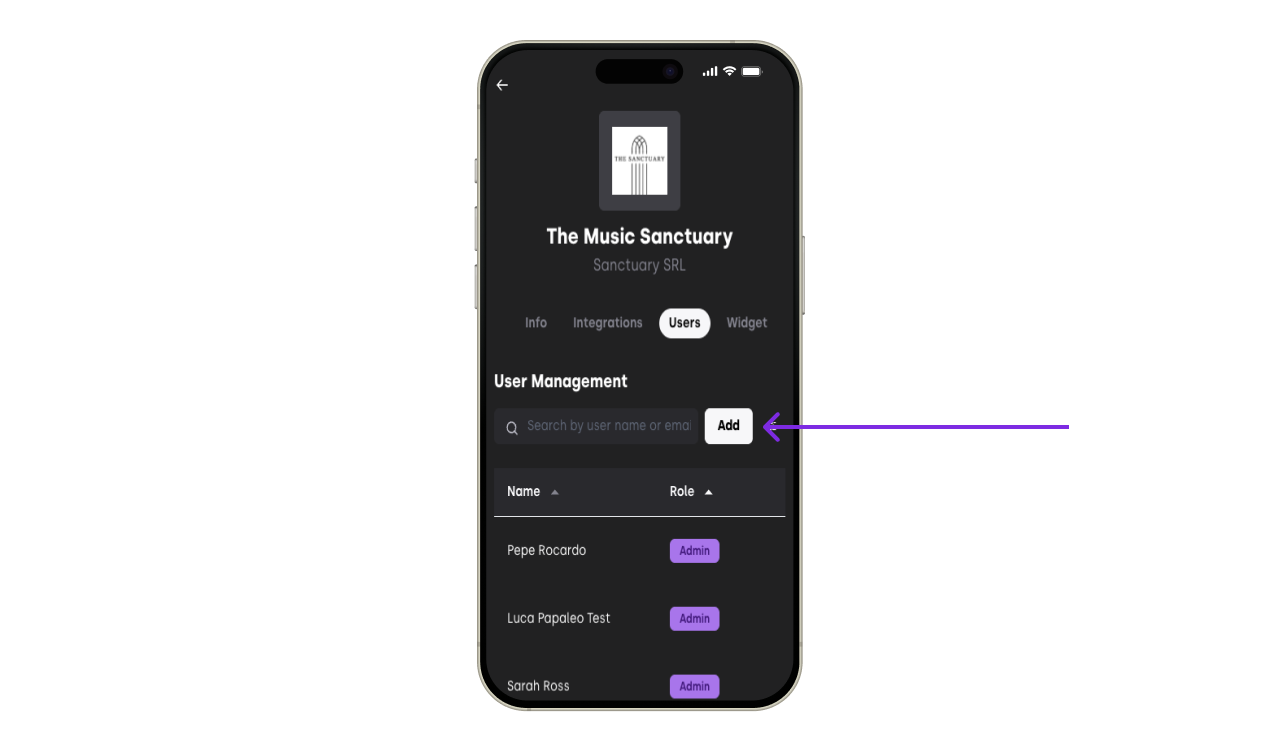
Choose the appropriate permission level
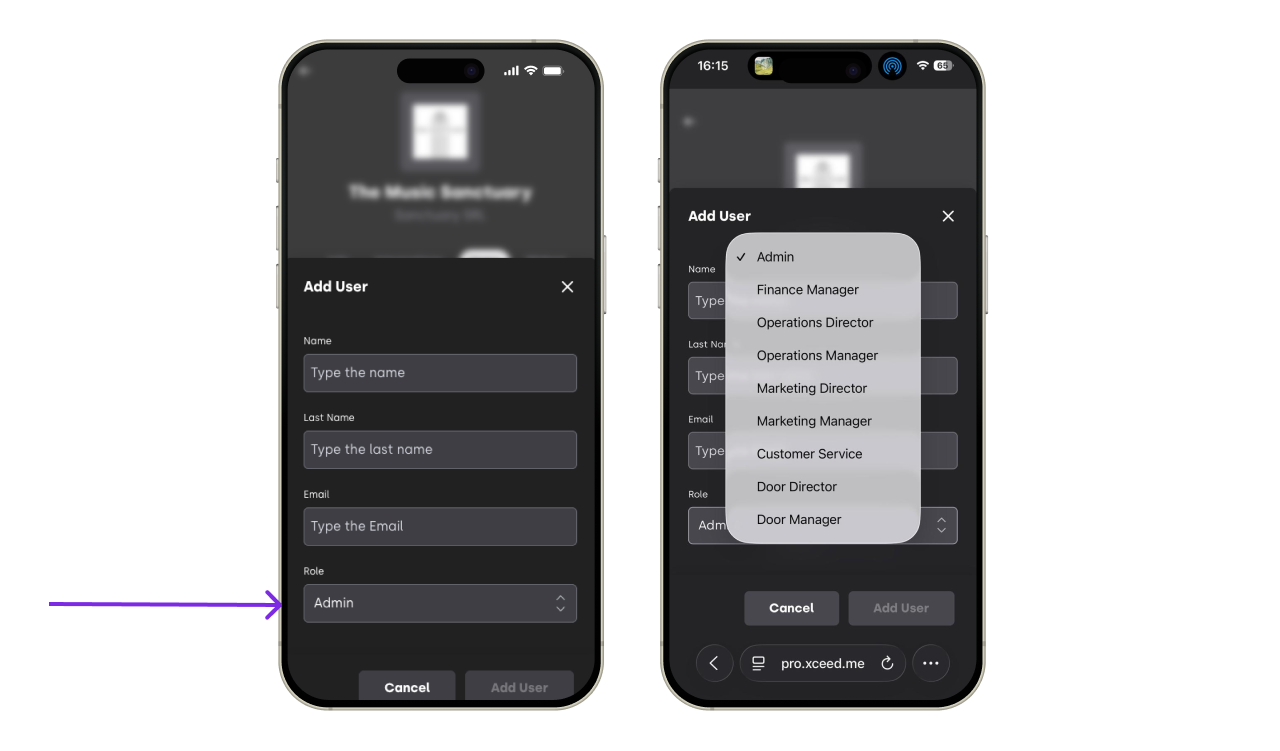


Always follow the principle of minimum access: give users only what they need to do their job.
3. Check or change users permissions
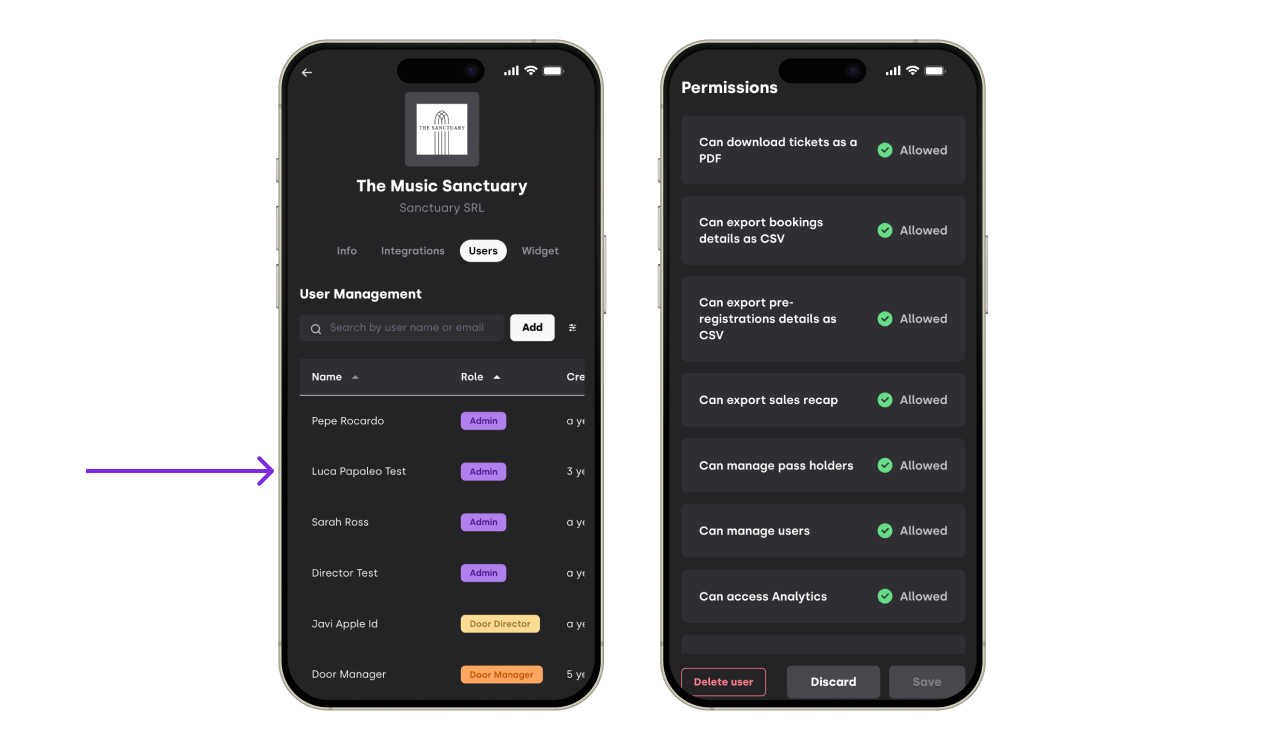
3.1 Check users permissions
If you are not sure what type of permission a certain user has click on the user and scroll down. A list of permissions will come up.
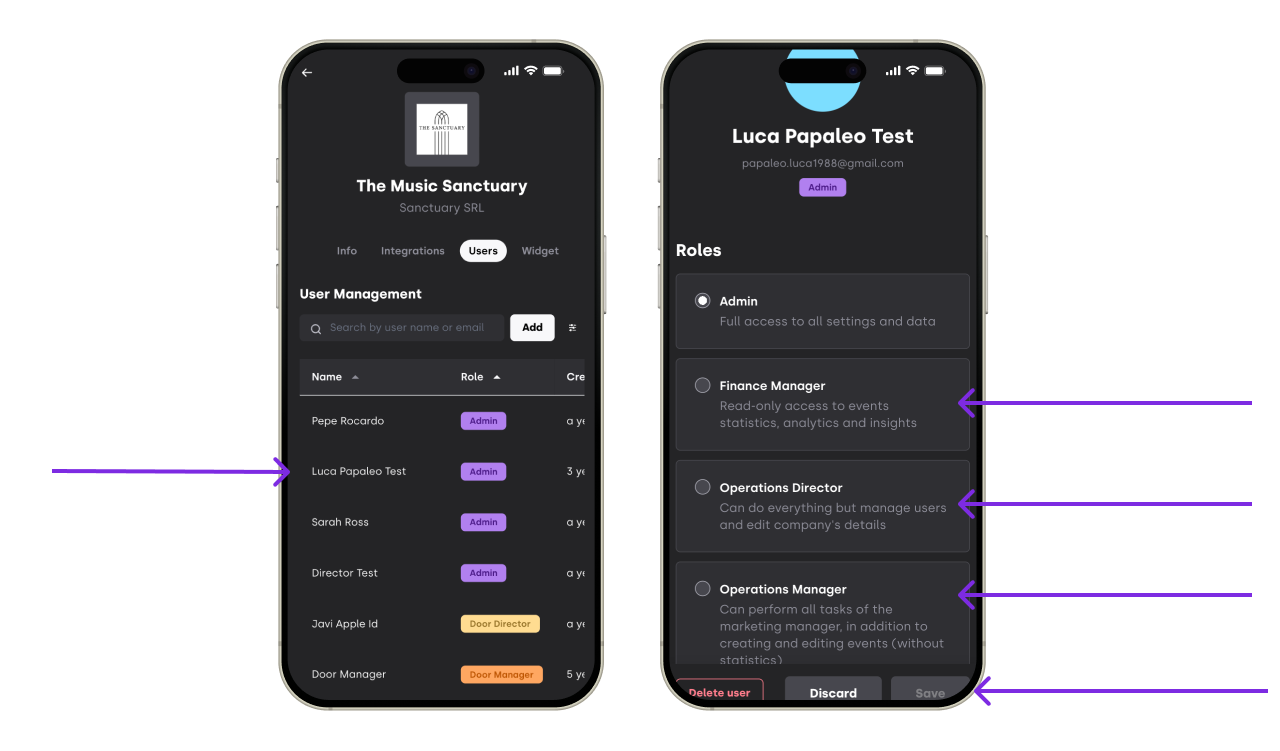
3.2 Change user permission
As admin change a user permissions at any point by clicking of the user and attributing a different role and clicking save
4. Best practices for teams
Limit Admin access to a small number of trusted users
Use Manager roles for day-to-day event operations
Assign Staff roles only when events are live
Review user access regularly, especially after events or team changes
If you have any other questions check our FAQ page or contact support@xceed.me