
Door Manager - Check-In Guests with the NEW XCEED ACCESS App
If you’re working at the door of an event, the XCEED Access app allows you to scan tickets, validate guest lists, monitor capacity, and control entry in real time.

1. Download and access the XCEED Access app
Before the event starts, make sure you have the XCEED Access app installed on your device. The app is available on:
Always update to the latest version before the event.
2. Open the XCEED Access app and log in using your XCEED credentials.

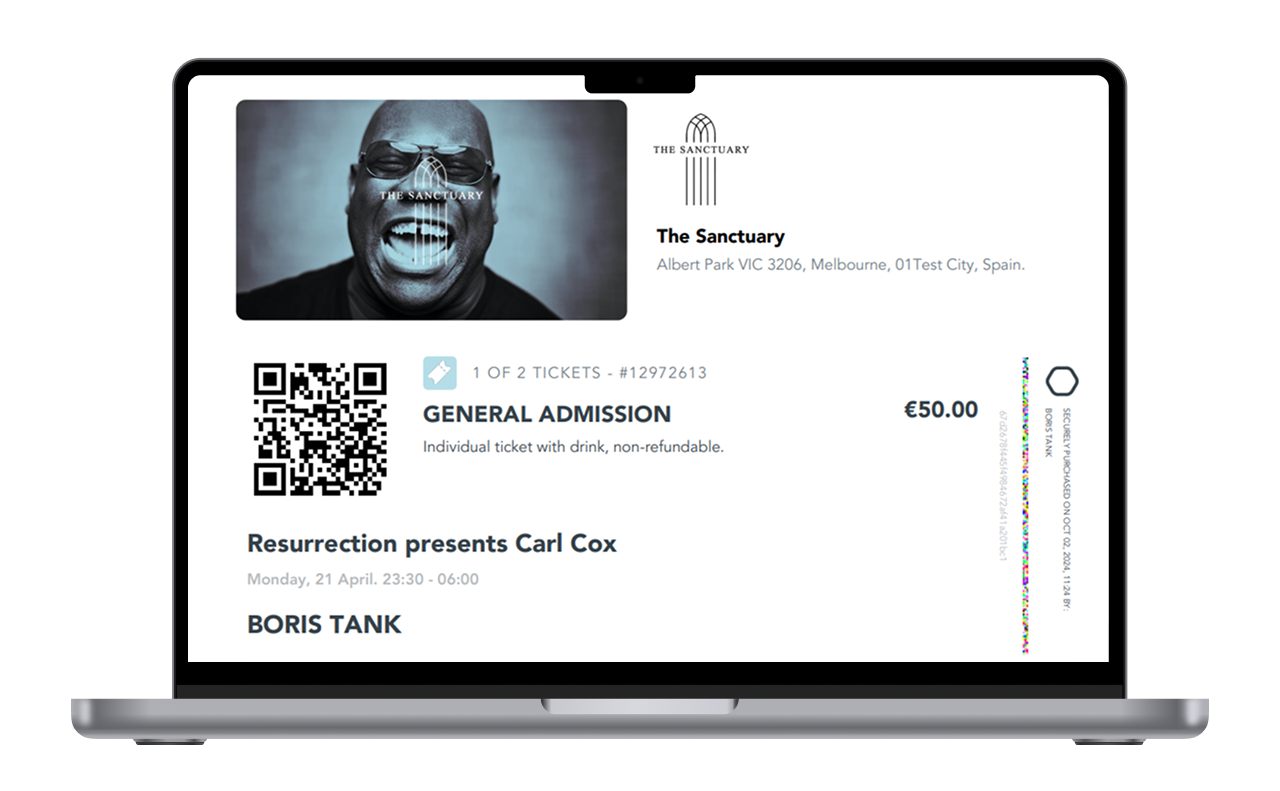
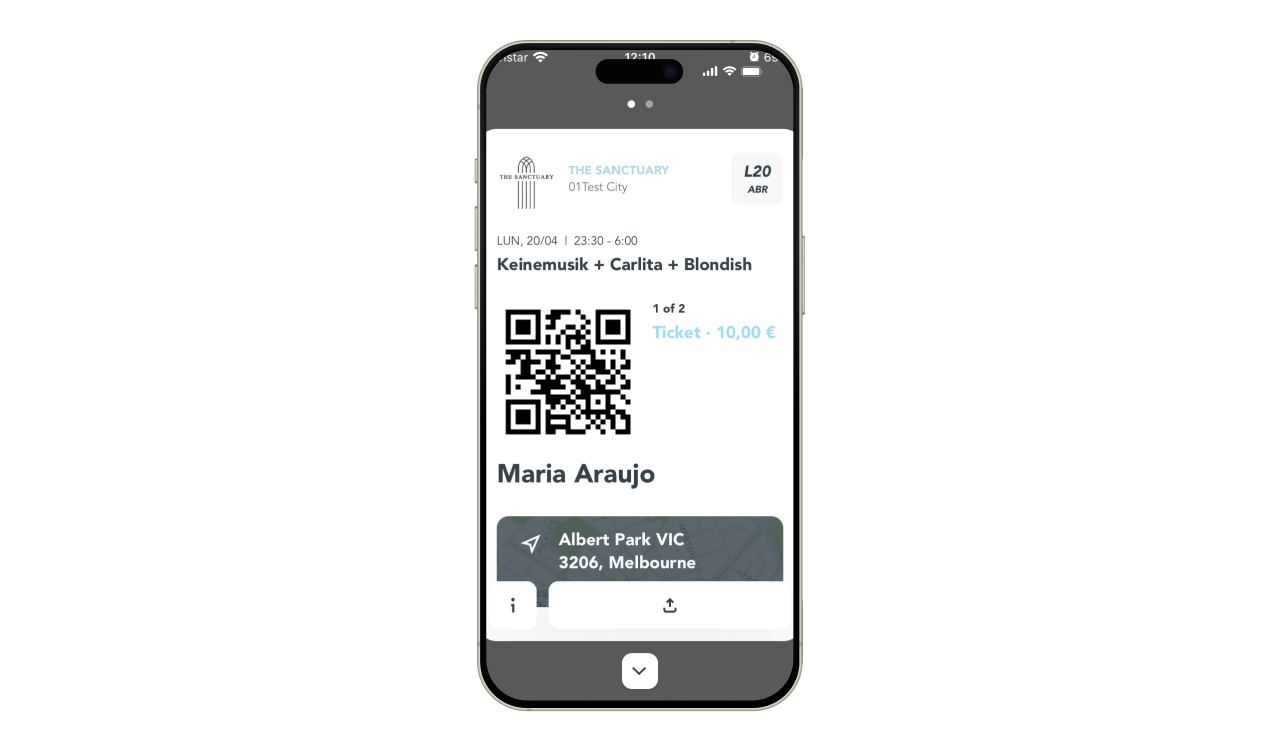
2. How does an XCEED ticket look?
Below is a screenshot of a digital ticket. Every customer on XCEED will receive their tickets in this format. All tickets include a QR code that can be used for check-in with the XCEED ACCESS App.
APP
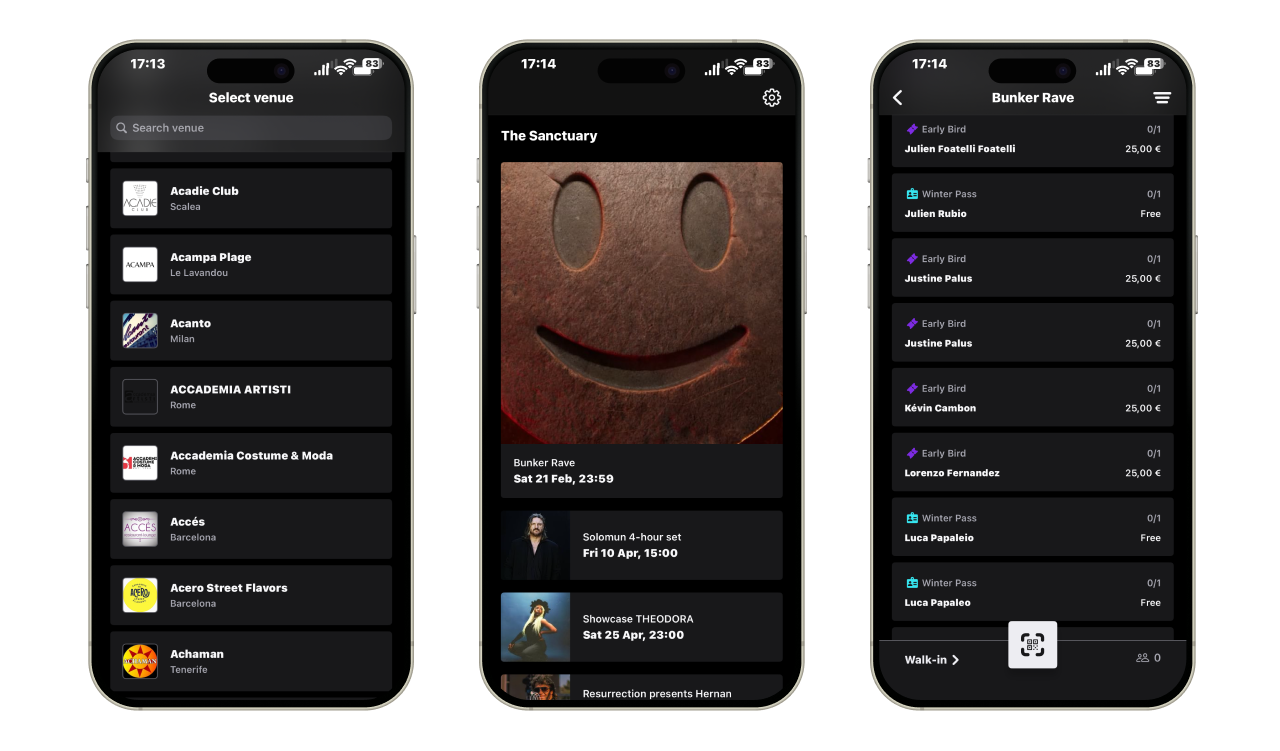
3. Select the event
After logging in:
Choose the venue in which the event takes place or search for the name of the search bar.
You will then see all your events taking place in that specific venue
You will now see all ticket types, guest lists, and entry tracking options related to that event. Each booking has a name, type of ticket, price and quantity.
For example: Ferran has a reservation with 2 guest lists and they both have been checked in - therefore 2/2. Joseph Anton on the contrary, has 1 ticket that hasn't been scanned (0/1).
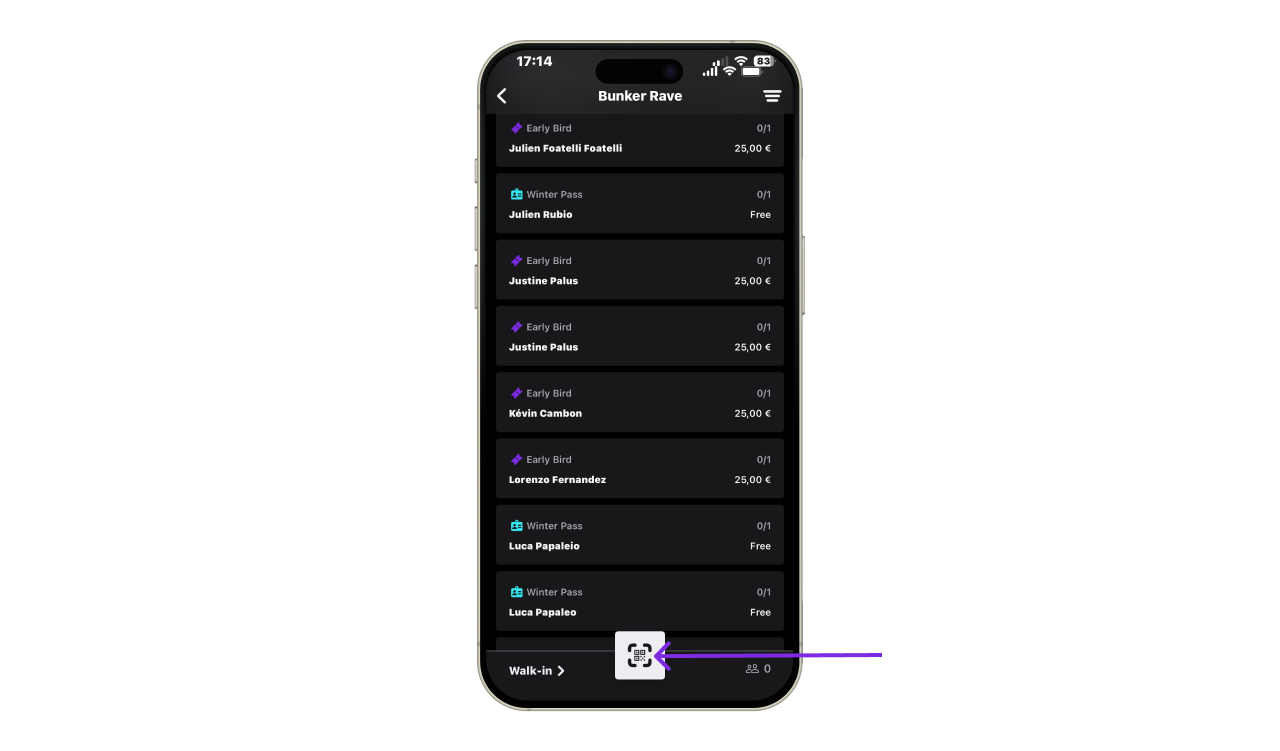
4. Tickets check in
4.1. Check in using the QR Code
Tap the Scan button.
Use your device camera to scan the QR code on the ticket (from the XCEED app or PDF).
Wait for validation confirmation.
4.2. Ticket validation results
After scanning, the app will immediately display:
✅ Valid ticket (entry allowed) in green
❌ Already scanned ticket in orange
❌ Invalid or unknown ticket in red
This helps prevent duplicate entries and fraud at the door.
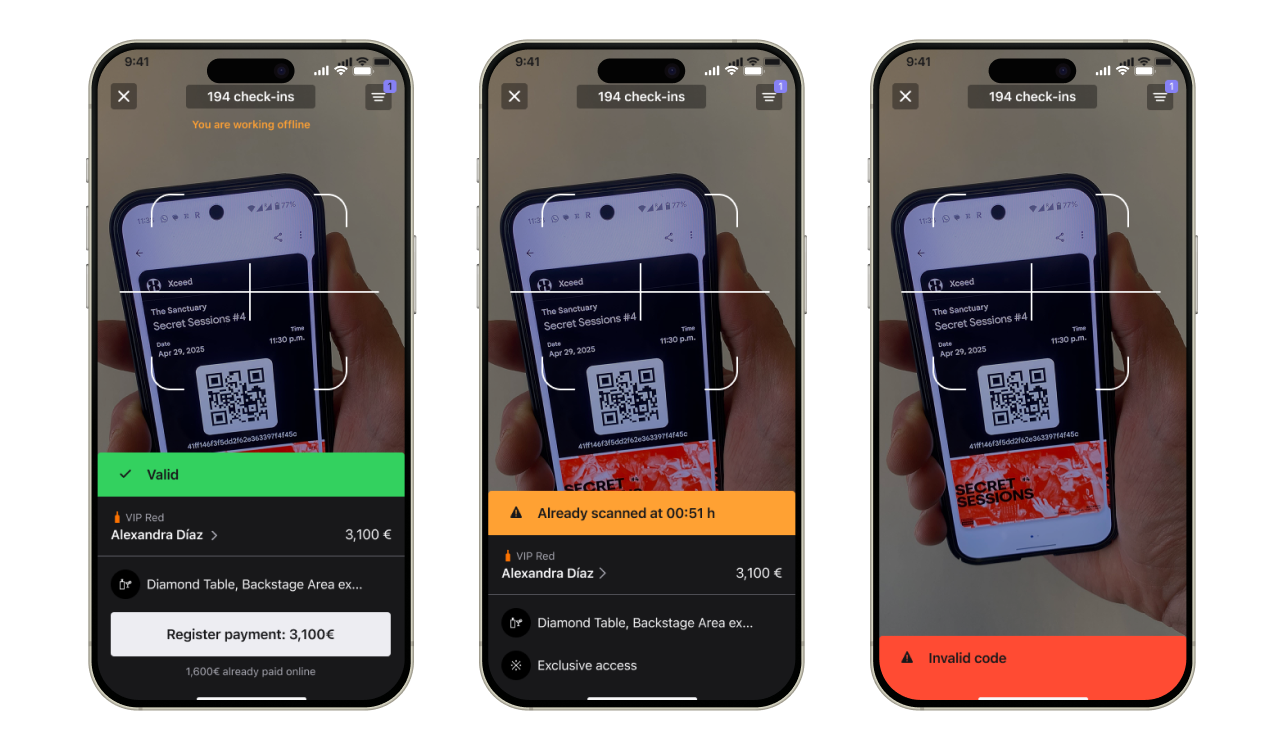
If the tickets have a time restriction and this is exceeded, it would look like this :
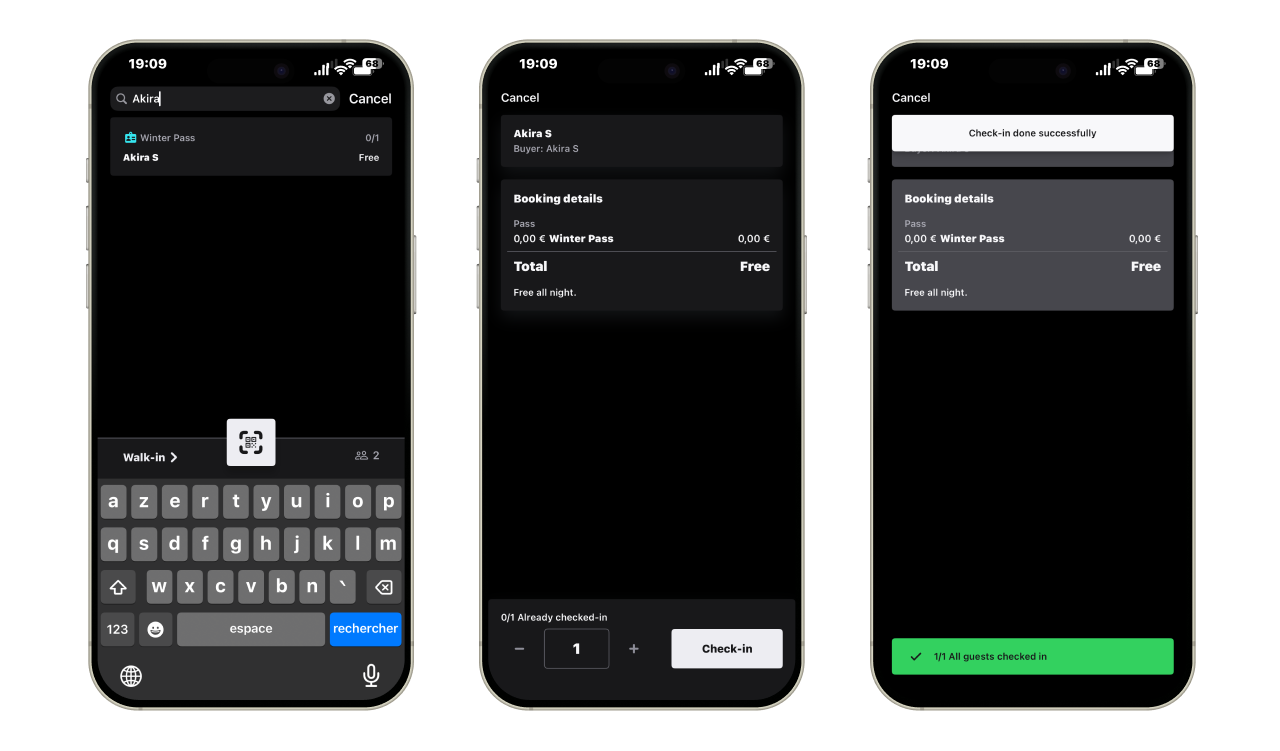
4.3. Check in guest lists manually
If a guest is on a guest list:
5.1. Go to the Guest List section inside the event.
5.2. Search by name.
5.3. Select the guest.
5.4. Confirm check-in manually.
This is useful if:
The guest does not have a QR code
There are scanning issues
The guest is part of a promoter list
5. Walk ins
Some of your guests might just arrive at the door without a ticket but you still want to keep count of the attendees of your event. This is why XCEED has the Walk in feature.
Whether its a guest coming from one of your PRs or just a show up, you can easily keep track.
Click on the bottom left on "Walk-in"
Choose to which PR you want to attribute this walk-in for. For example, Angelo Boring.
Add the number of walk-ins and click save.
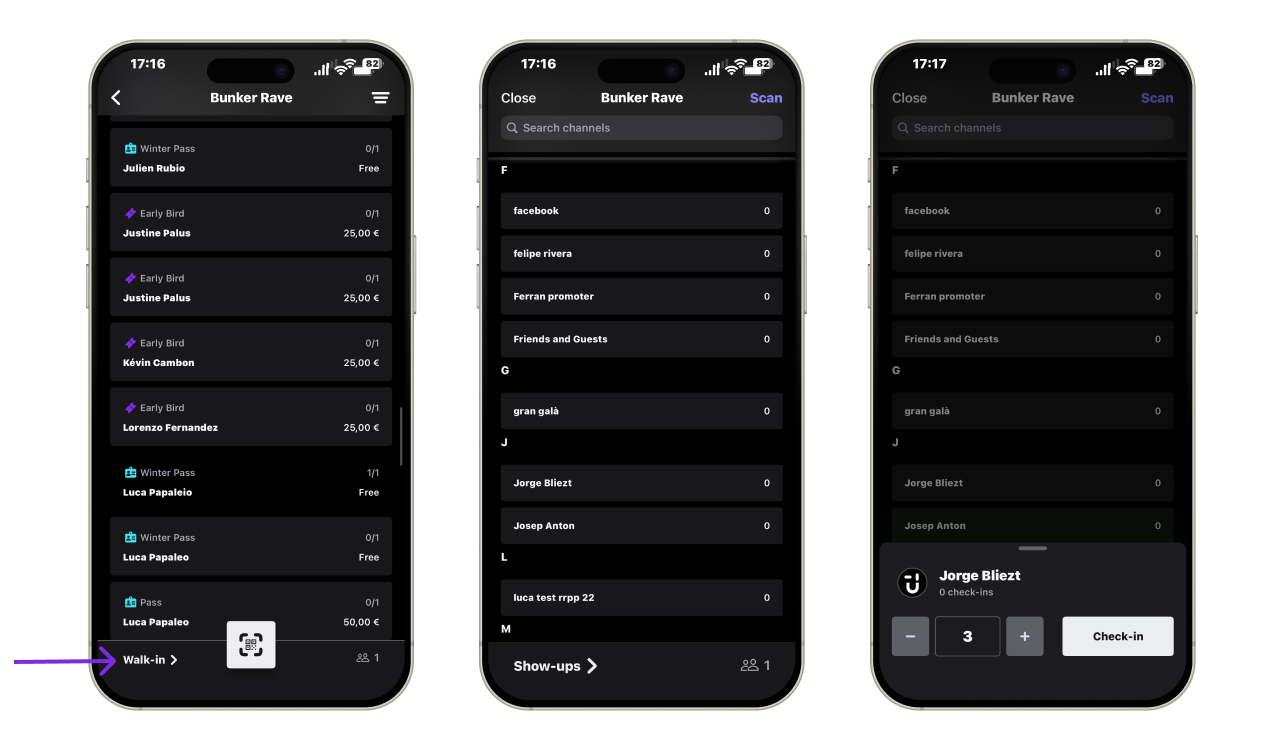
If you don't want to attribute it to any PR, you can just choose the option "show up" on the bottom left corner and just the same, select how many show ups there are.
6. Filters
At the top right of the app, you will find several filters. You can filter by:
Check in status
Offer type
Add on
Sales channel
This can be helpful especially in case different door mangers need to scan different types of tickets.
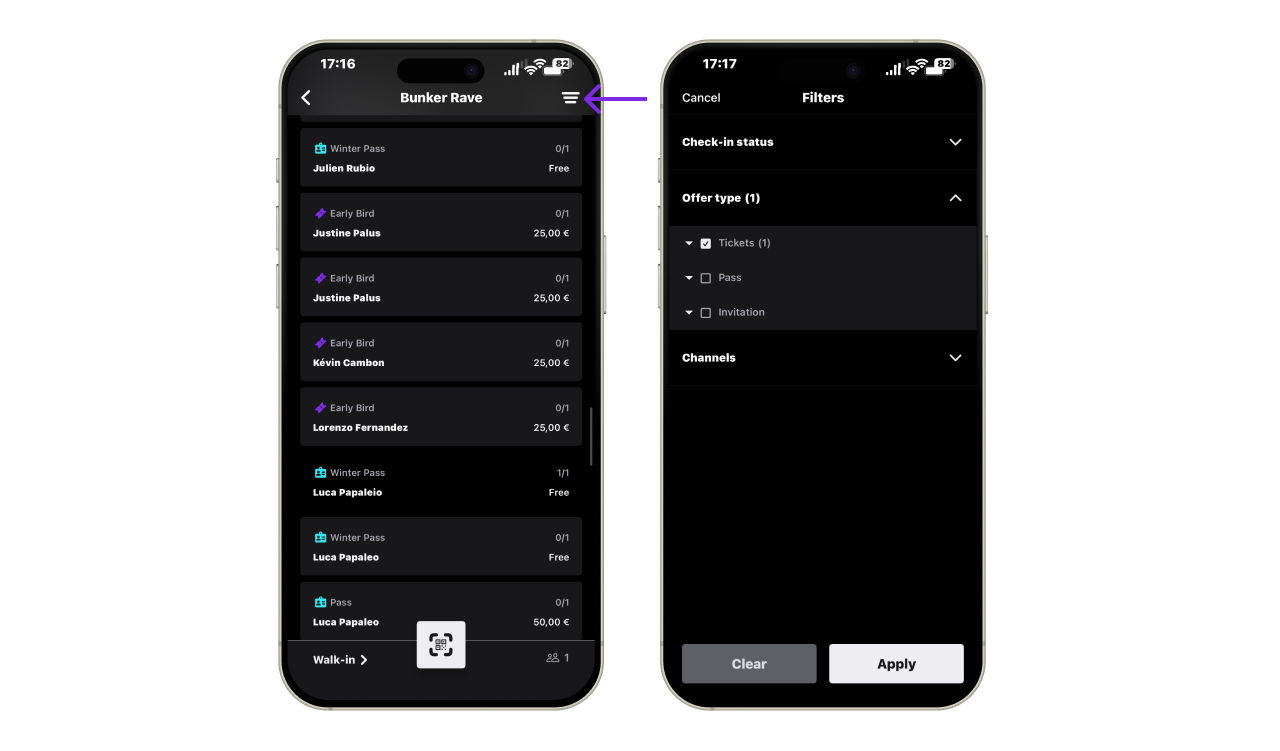
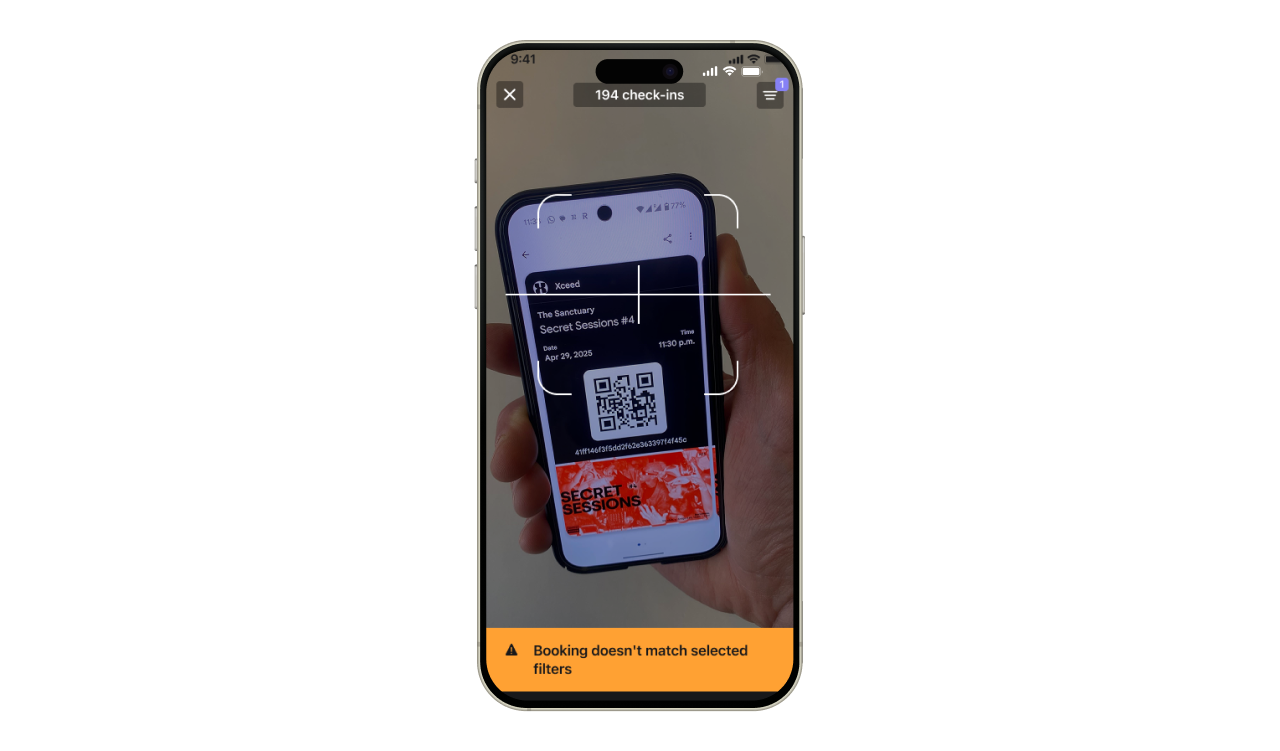
Once filters are applied, manual checkin and scans will take them into account. For example, if I apply the filter for guest list and then try to scan a ticket, I will get a orange message saying "This reservation doesn't coincide with the filters selected".
7. Change venue and log off
From the Events tab, click on the settings icon on the top right corner to access your options.
Log out: Click on log out to exit your profile in the app
Change Venue: Click on the change venue button to get back to the screen of selecting venues.
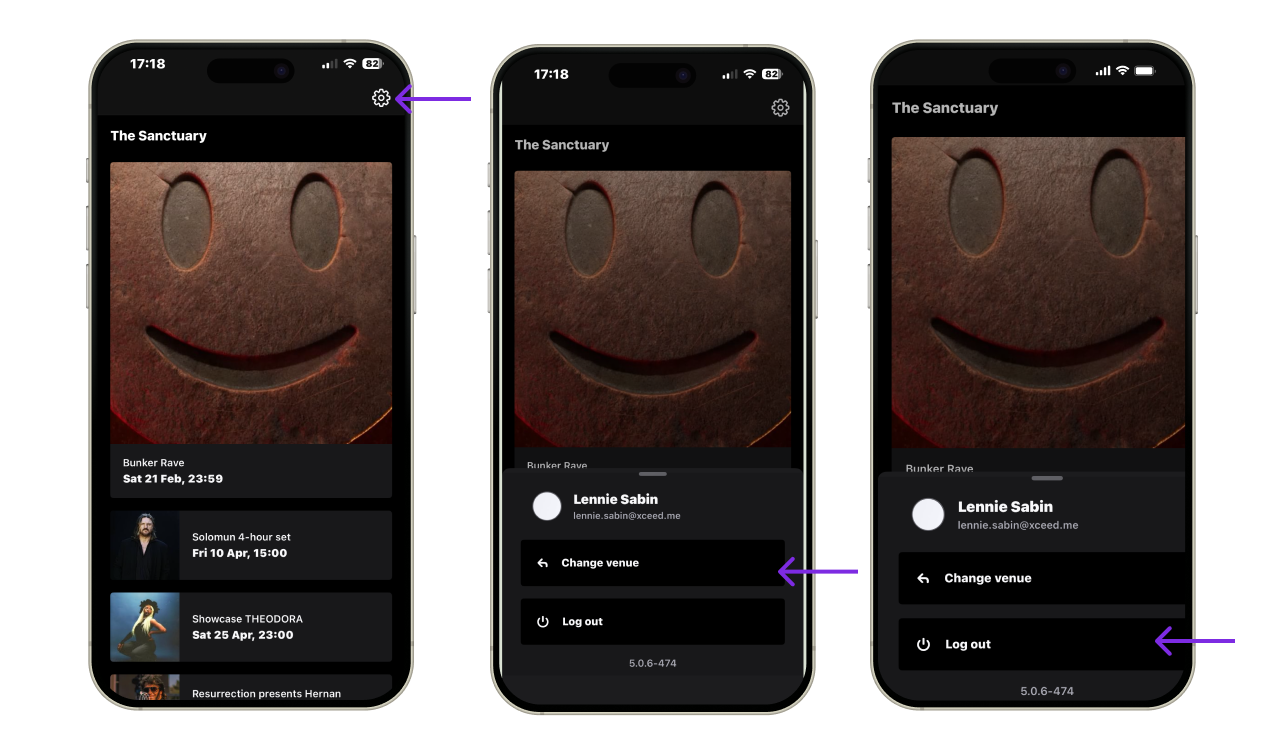
If your screen appears blank (no events), it's likely that the event you want to scan isn't in the same venue as the previous one. In this case you should go to settings and change venues.
8. Offline mode
The XCEED Access app can operate in offline mode if the connection is unstable.
However:
A stable internet connection is strongly recommended.
Offline scans will sync automatically once connection is restored.
Avoid switching devices mid-event when operating offline.
If you have any other questions check our FAQ page (https://support.xceed.me/en/collections/747037-help-center-organizers) or contact support@xceed.me