
How to install the XCEED Widget
This guide explains how to install the XCEED widget step by step so your customers can browse and buy tickets without leaving your site. This translates into:
Fewer drop-offs, a smoother journey, and higher conversion rates.
Keep full control of your brand experience
Track performance by traffic source
1. Prepare your XCEED Pro settings
Log in to your XCEED Pro account.
Click Settings (bottom left)
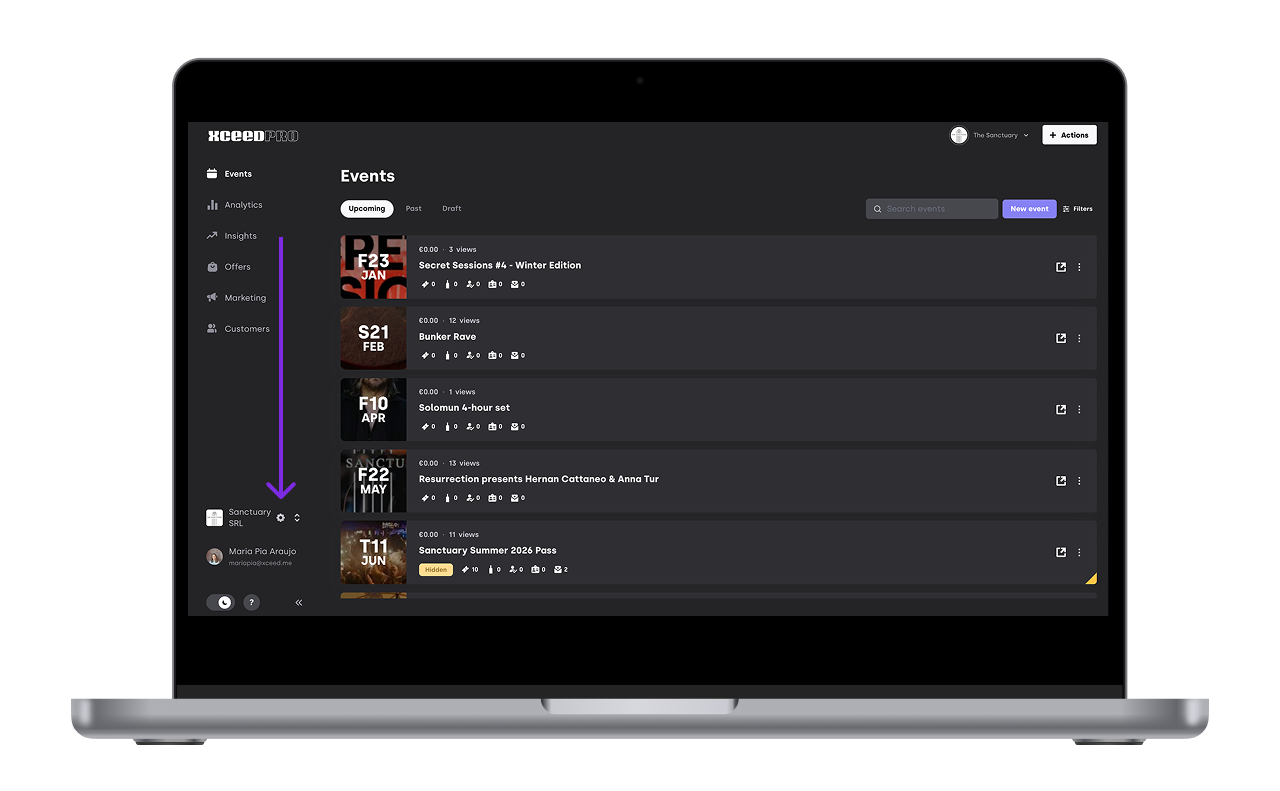
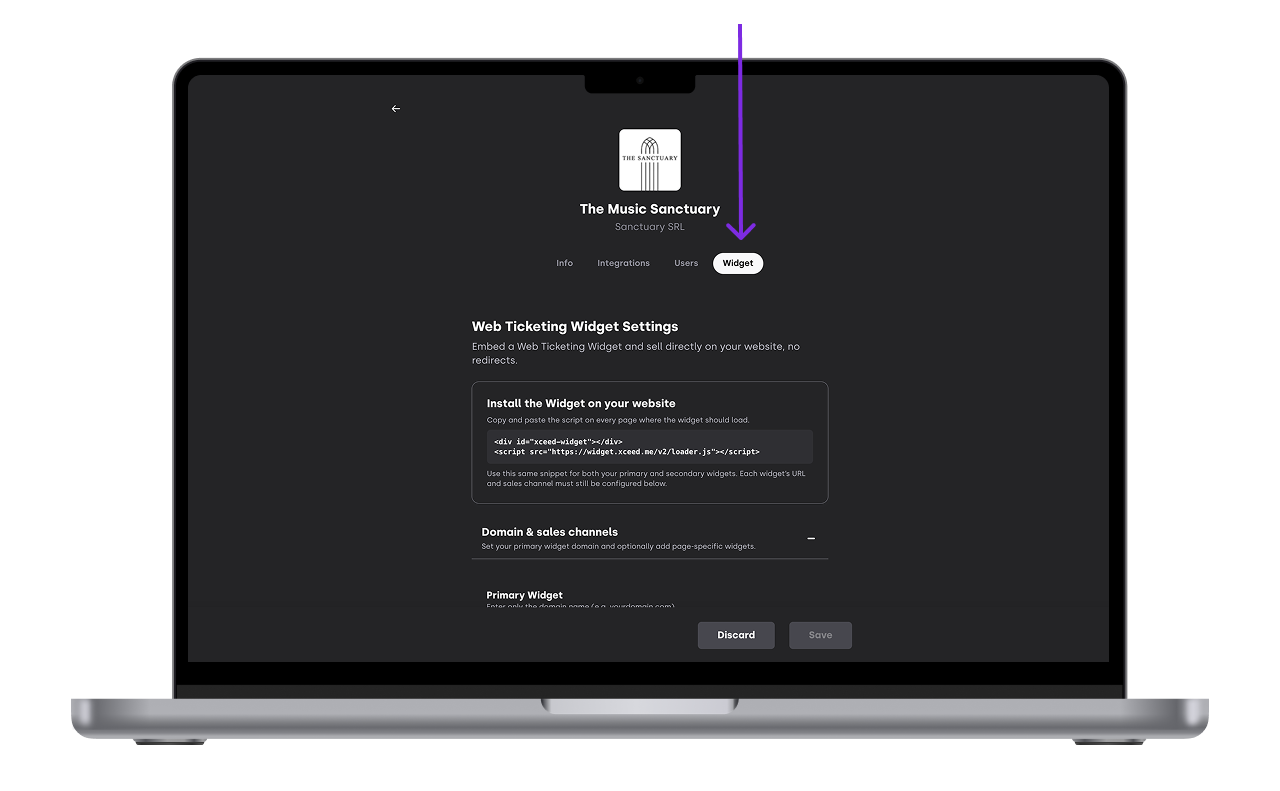
Select Widget
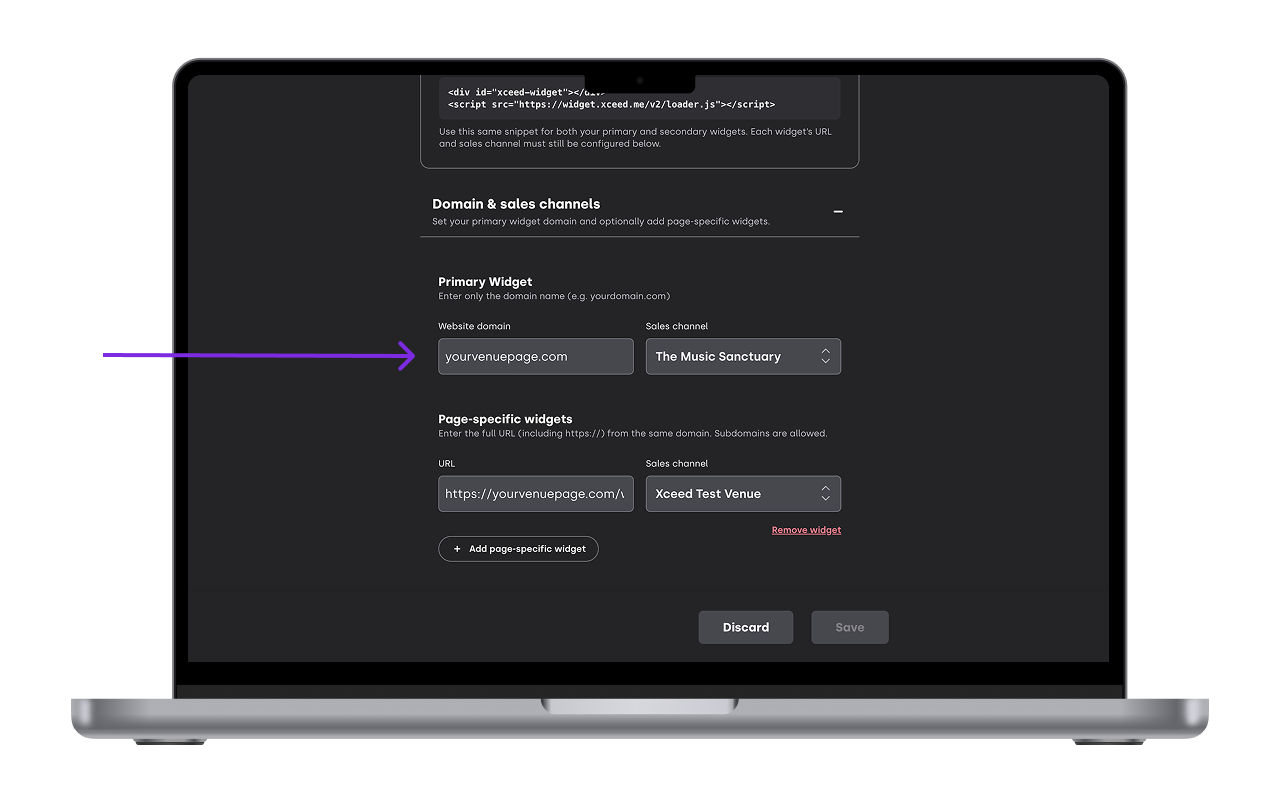
In Website Domain, paste the URL of the site where you want the widget to appear (Main URL, not a specific page without https://)
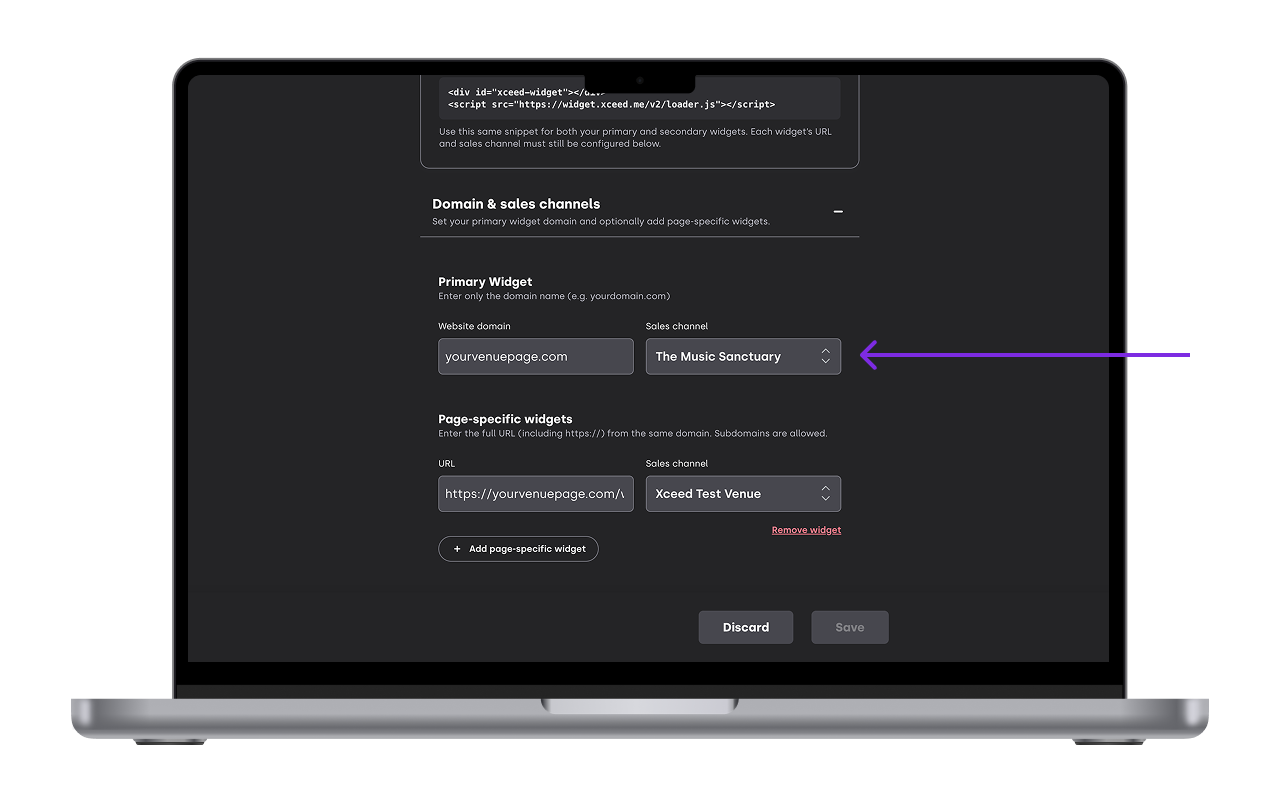
By default, the widget will use your main sales channel (for example “The Music Sanctuary”) but you can also change it at any point


2. Add the widget code to your website
Open the HTML of your website page where you want the widget to show.
Inside the
<body>tag, paste the following code:<div id="xceed-widget"></div> <script src="https://s3-eu-west-1.amazonaws.com/xceed-widget/2019-version/dist/loader.js" type="text/javascript"></script>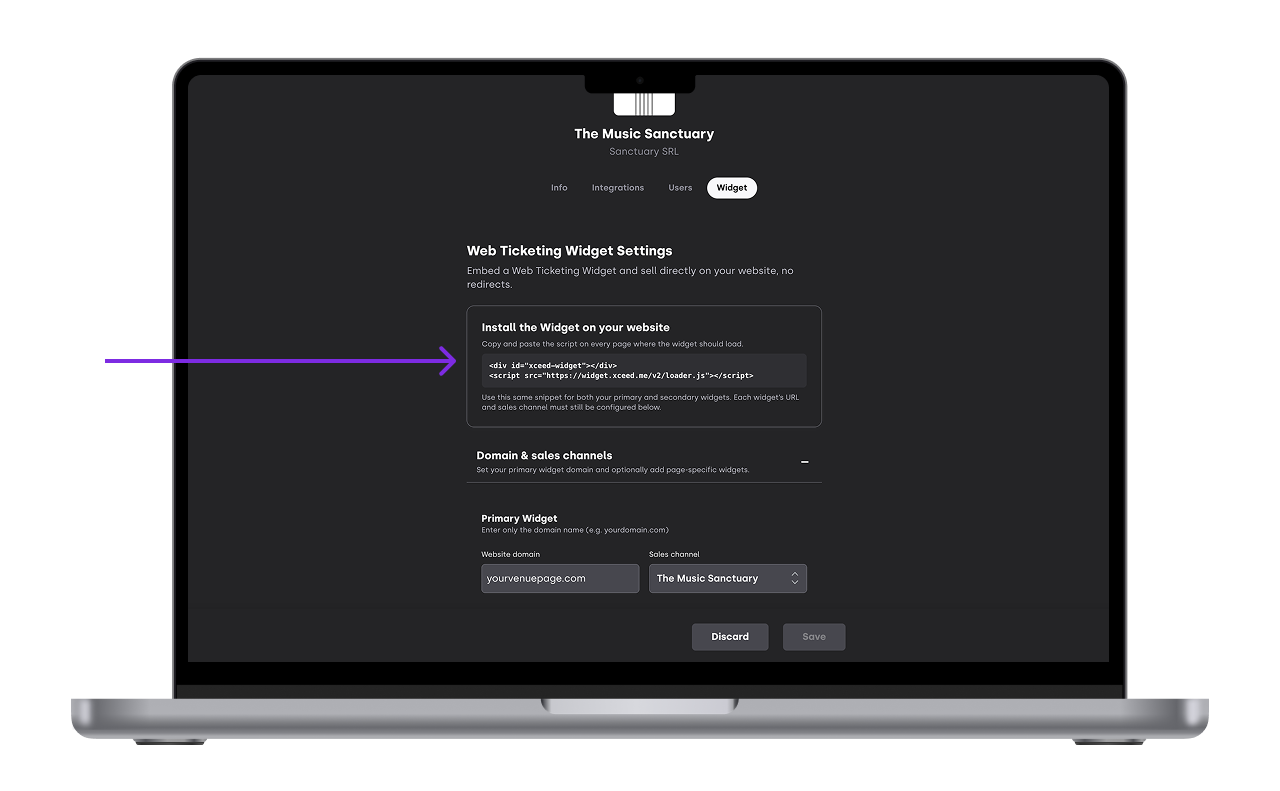
Save your changes.
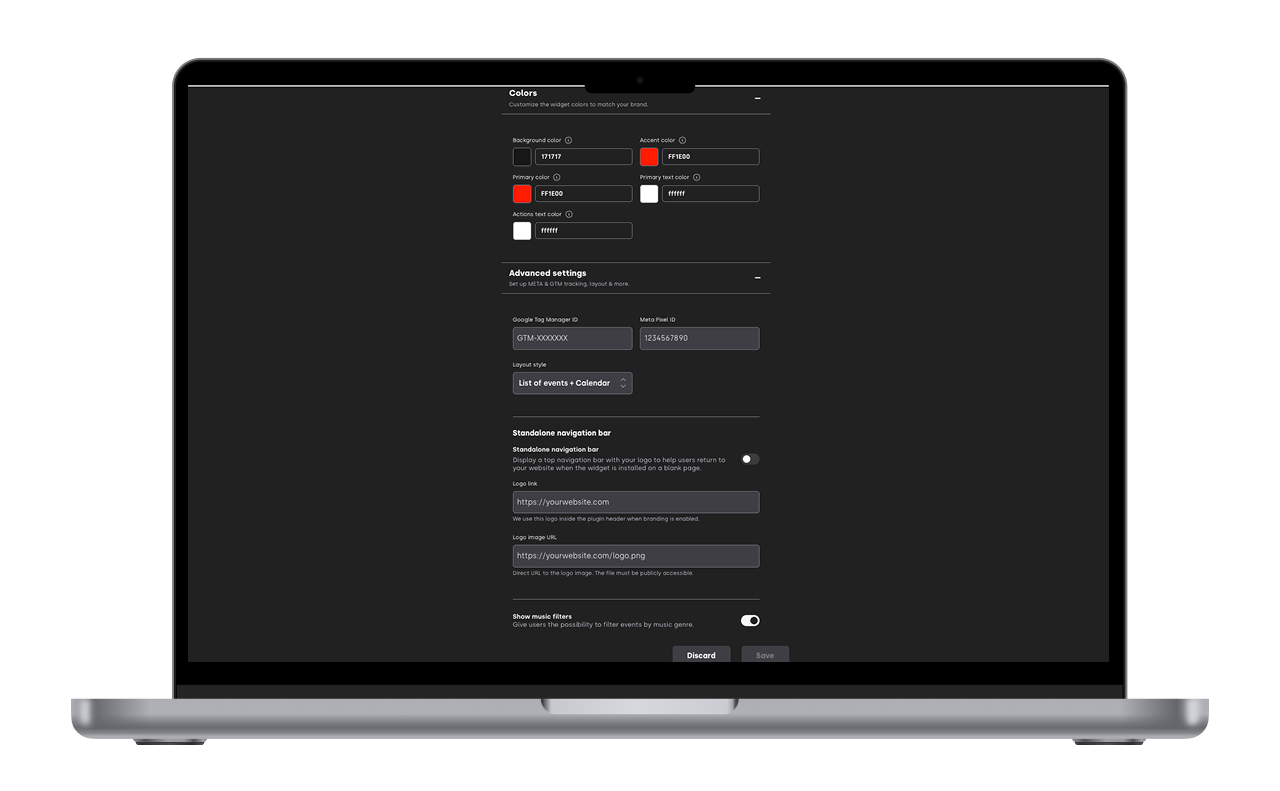
Return to XCEED Pro to customise the look and feel of the widget as needed a well as better tracking using Meta pixel and GTM

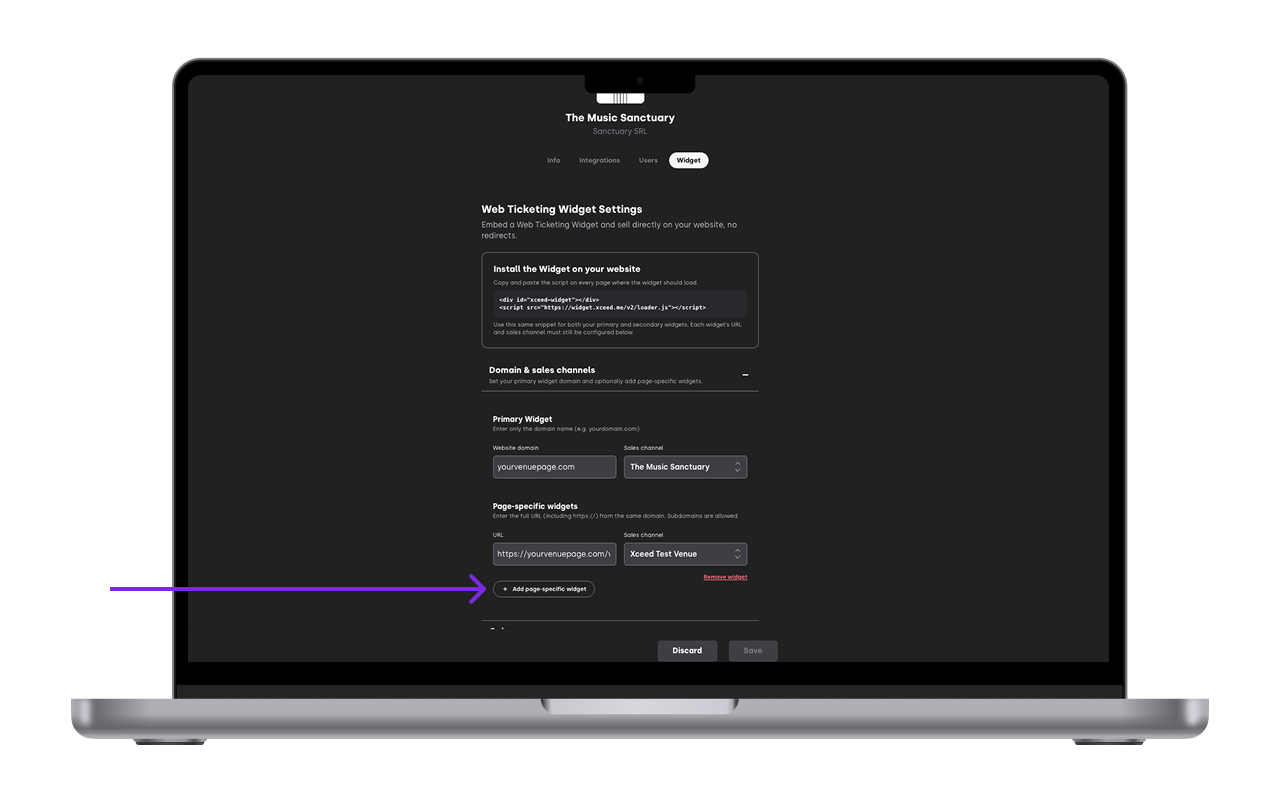
4. (Optional) Track traffic with multiple sales channels
Create separate landing pages on your website for each source of traffic (e.g., your paid ads).
In XCEED Pro, go to the Marketing tab and create a new sales channel (for example “meta-ads”) - See more on how to create sales channel here.
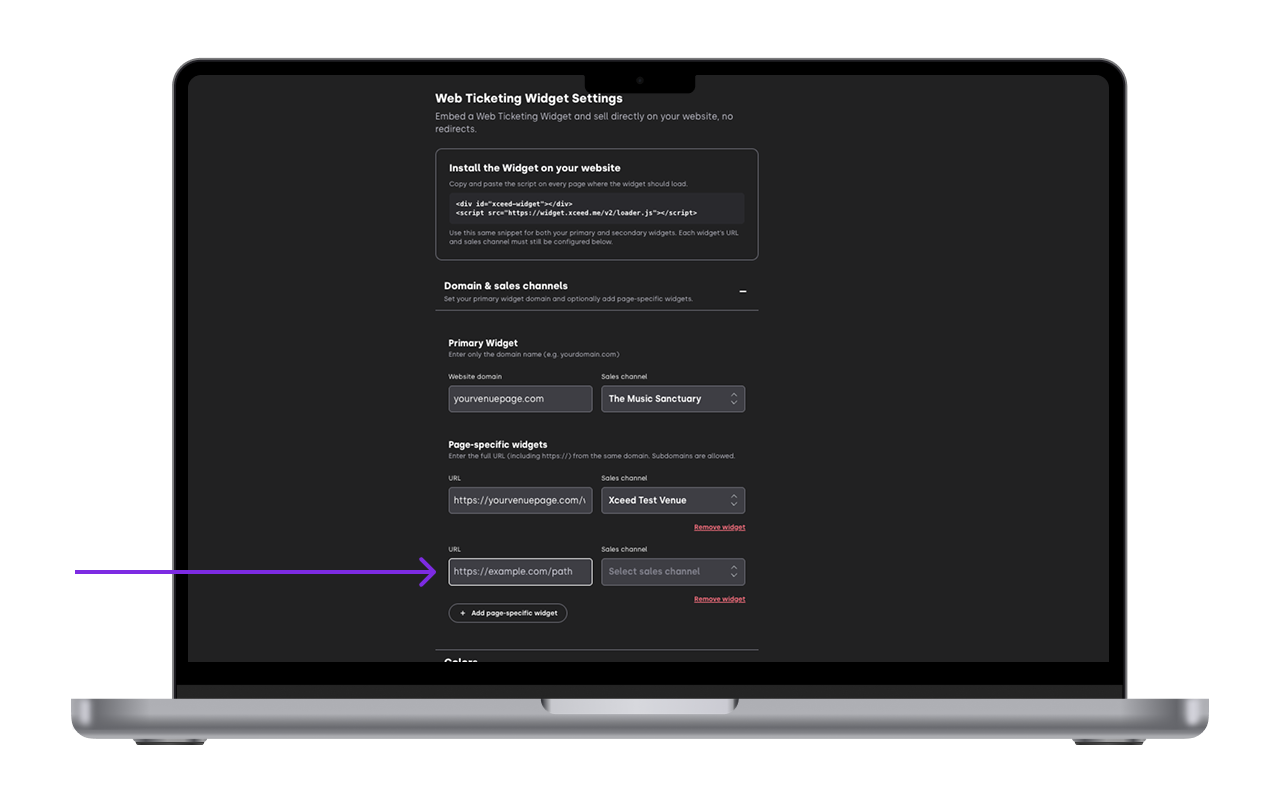
Back in Settings > Widget, add the new landing page URL and assign it to the corresponding sales channel. This lets you see which traffic sources drive widget sales.


Here is an example of what a widget looks like: https://yourvenuepage.com/events/#/events
If you have any other questions check our FAQ page or contact support@xceed.me