
Create Door Directors and Door Managers
This feature lets you give specific people (door staff) the ability to scan tickets and check in guests at your event, without exposing sensitive data like sales or revenue.
You can choose between two roles depending on what actions you want them to be able to do.
1. Door Manager vs Door Director
There are two roles you can assign for door staff:
Door Manager – can scan and check in guests at the door.
Door Director – can scan, check in guests, and refundtickets at the door.
Choose the role based on the level of responsibility you want to give them.
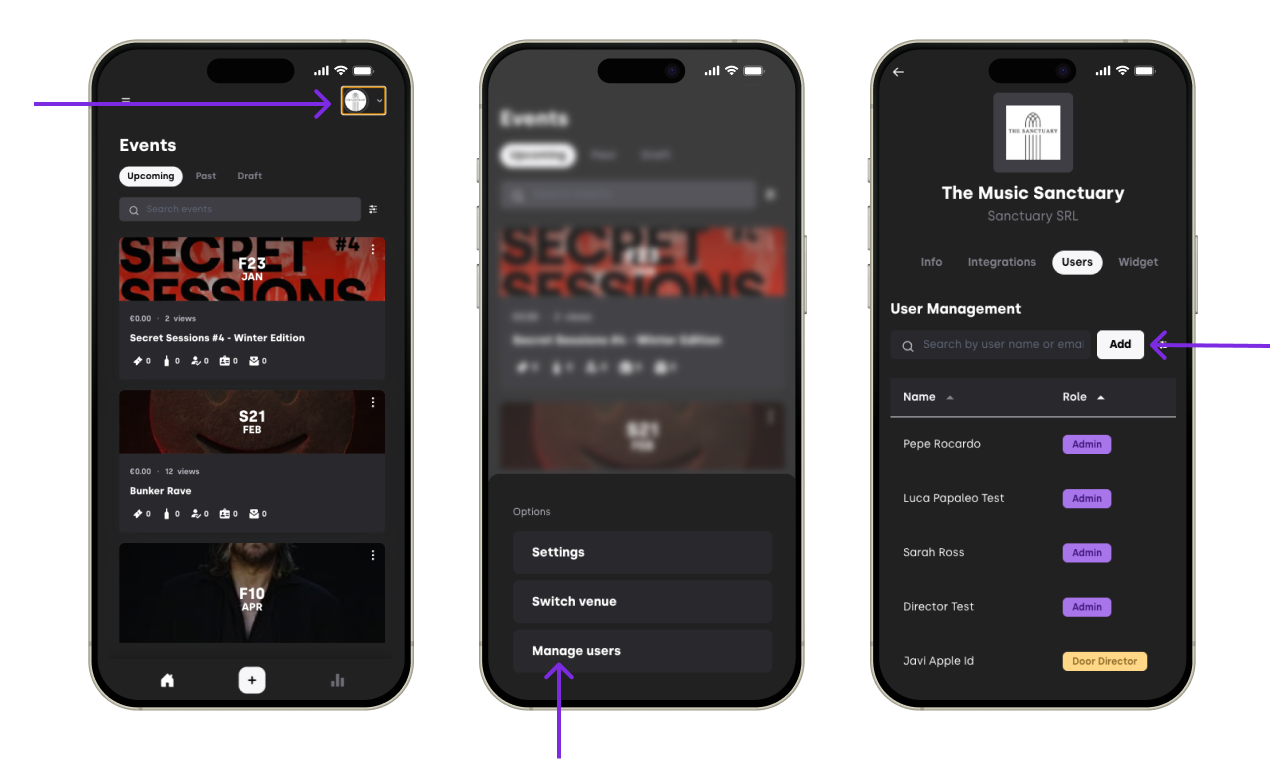
2. How to set up door staff
Go to Manage Users (inside XCEED Pro) in your venue or organisation settings.
Click on Add
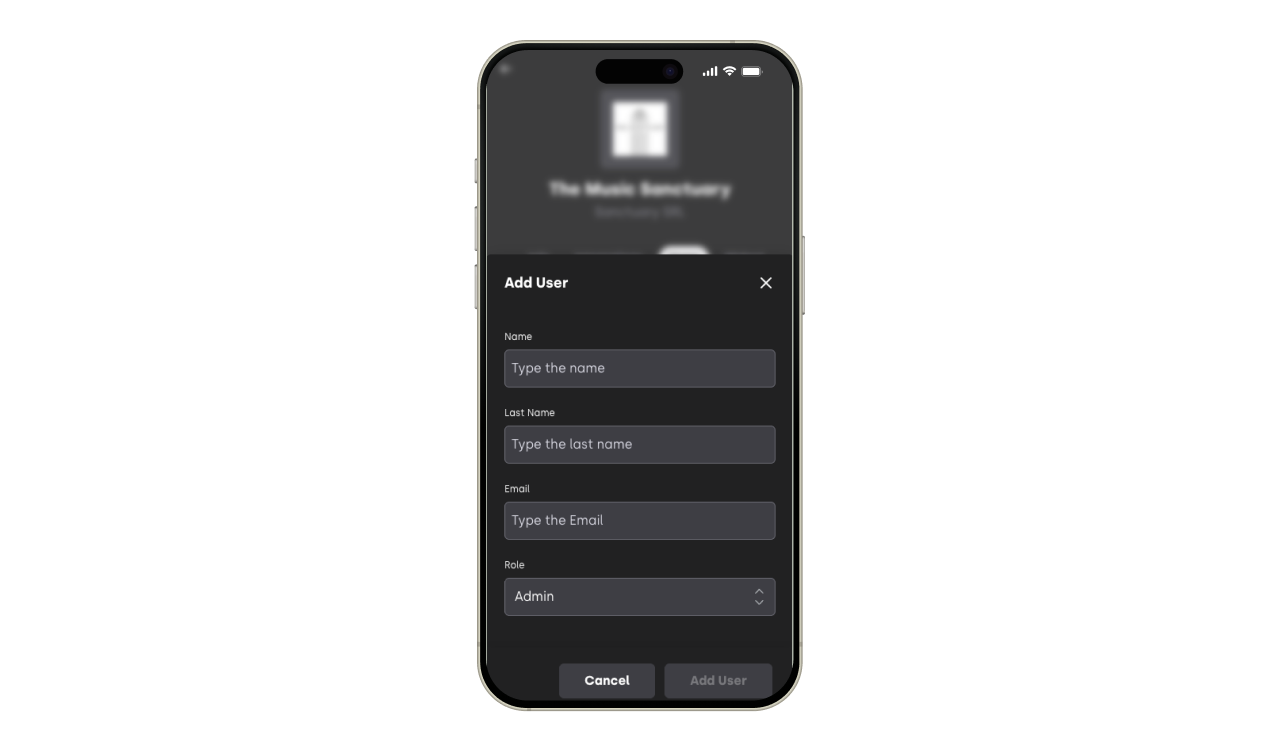
3. Enter the user’s name and email address
4. Choose the role: Door Manager or Door Director.
5. Click Add User.
Now this user can log in to the XCEED Access app using their email and start scanning tickets at the door (See more details here)
3. Tips for using door roles
Make sure each staff member has the correct role before your event starts.
Door Directors are helpful if you expect on-site refunds or ticket changes.
Door Managers are ideal for basic check-in without financial permissions.
If you have any other questions check our FAQ page or contact support@xceed.me