
Create and manage your event - XCEED Pro
Use this feature to launch club nights, festivals, private parties, or VIP experiences, manage ticketing and guest lists, and control visibility across your sales channels.
Agenda
Create your event
1.1 Access event creation
1.2 Fill in the event information
1.3 Visuals and description
1.4 Additional event settingsAdd your sales products (offers)
2.1 Types of offers
2.2 Offers on sale for general public
2.3 Offers order
1. CREATE YOUR EVENT
1.1 Access event creation
Log in to your XCEED Pro account and click on Create Event.
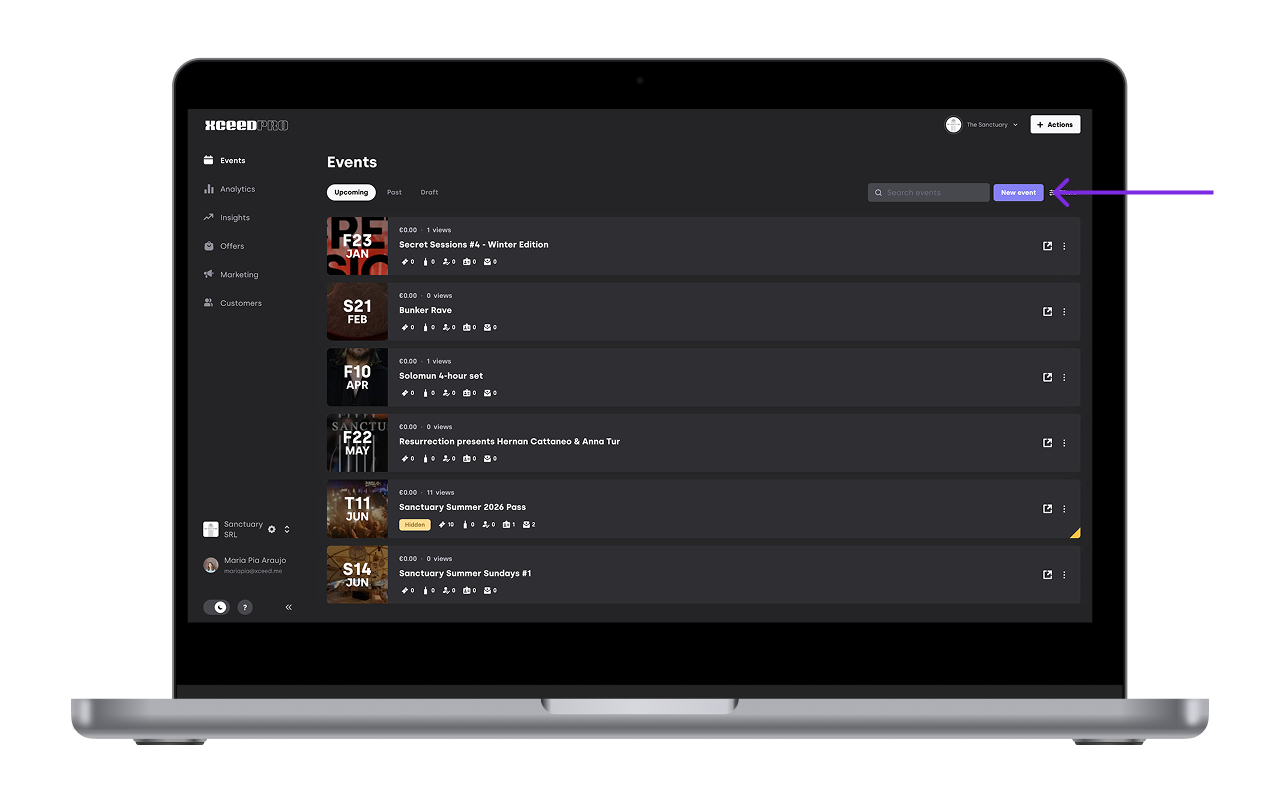
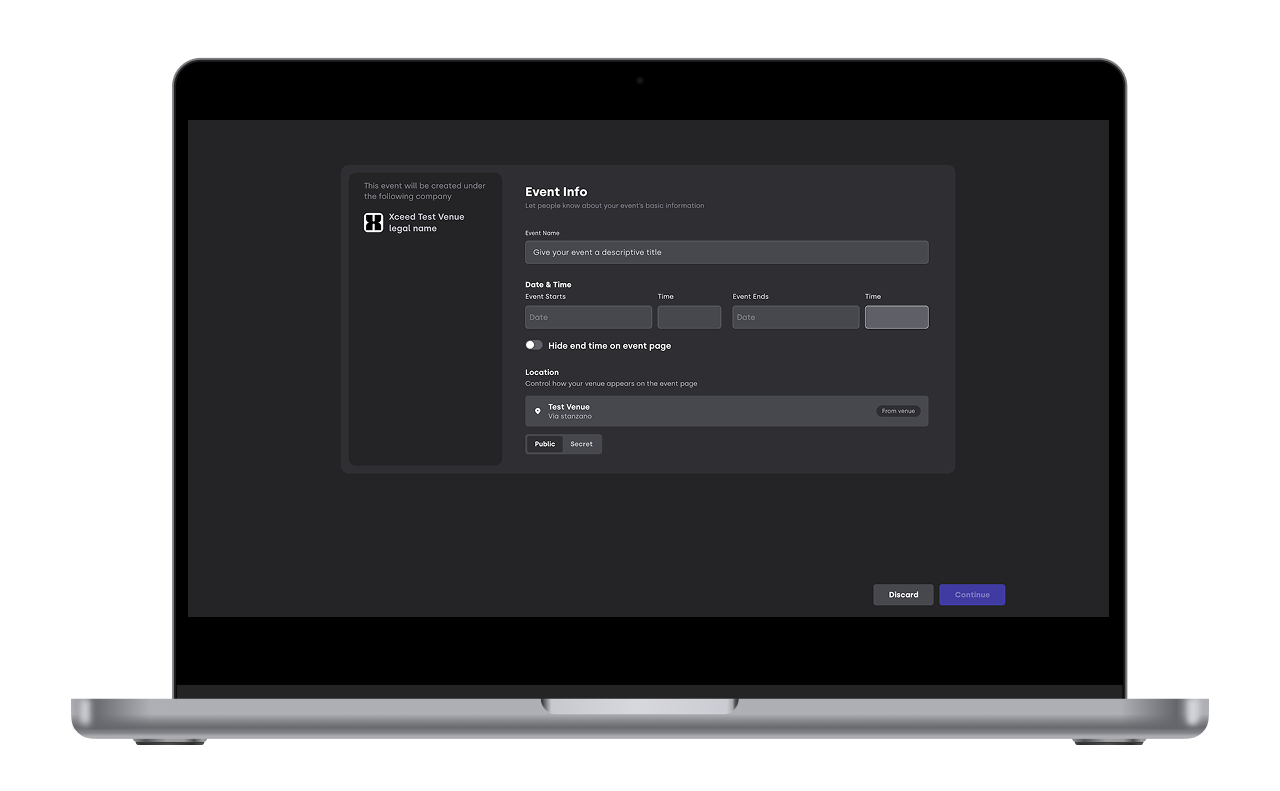
1.2 Fill in the event information
1.2.1 Event title: Choose a clear title for your event. Do not use capital letters in the title.
1.2.2 Event time: Define the event duration.
1.2.3 Location: Decide if you want to announce your event location right away or keep it a secret and reveal it later
Important:
If your event runs from Friday night to Saturday, set the start time to 23:59 on Friday.
Setting it to 00:00 would mean the event starts at the beginning of Friday, which is a common mistake.
1.3 Visuals and description
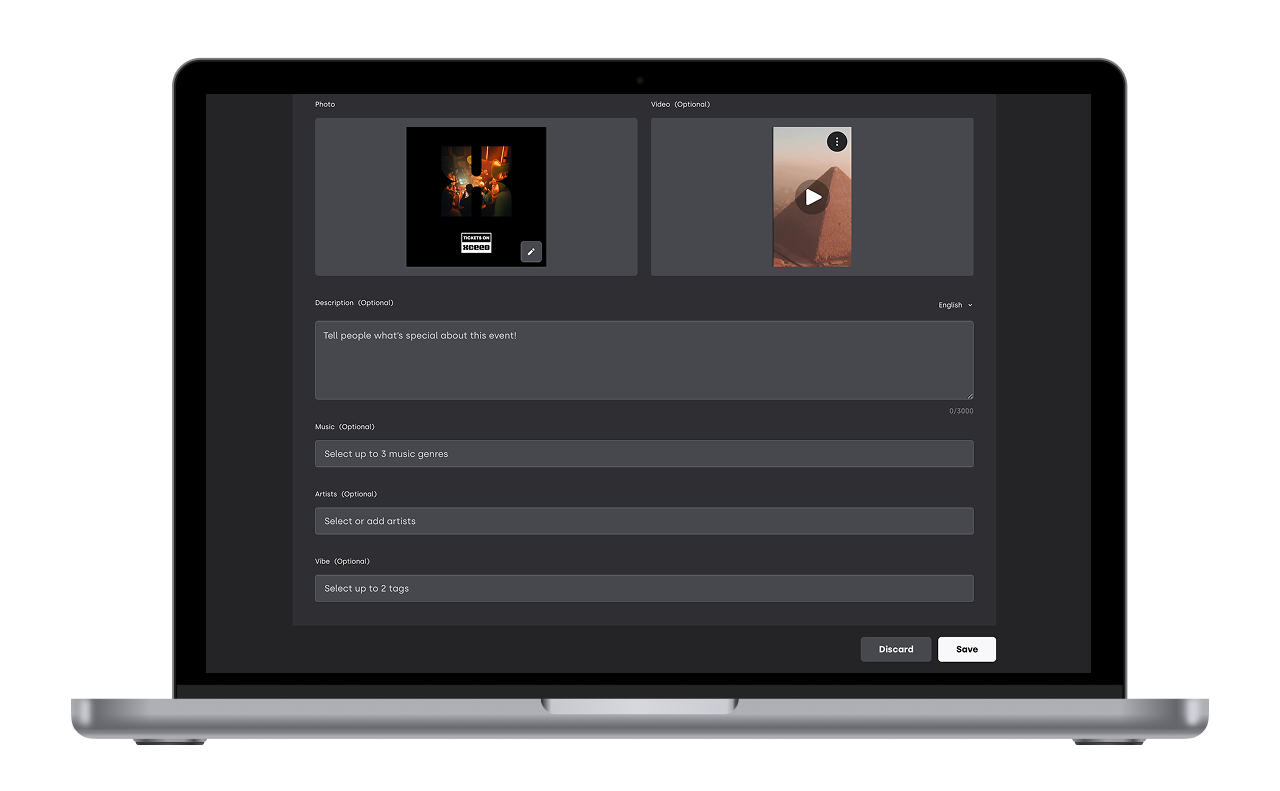
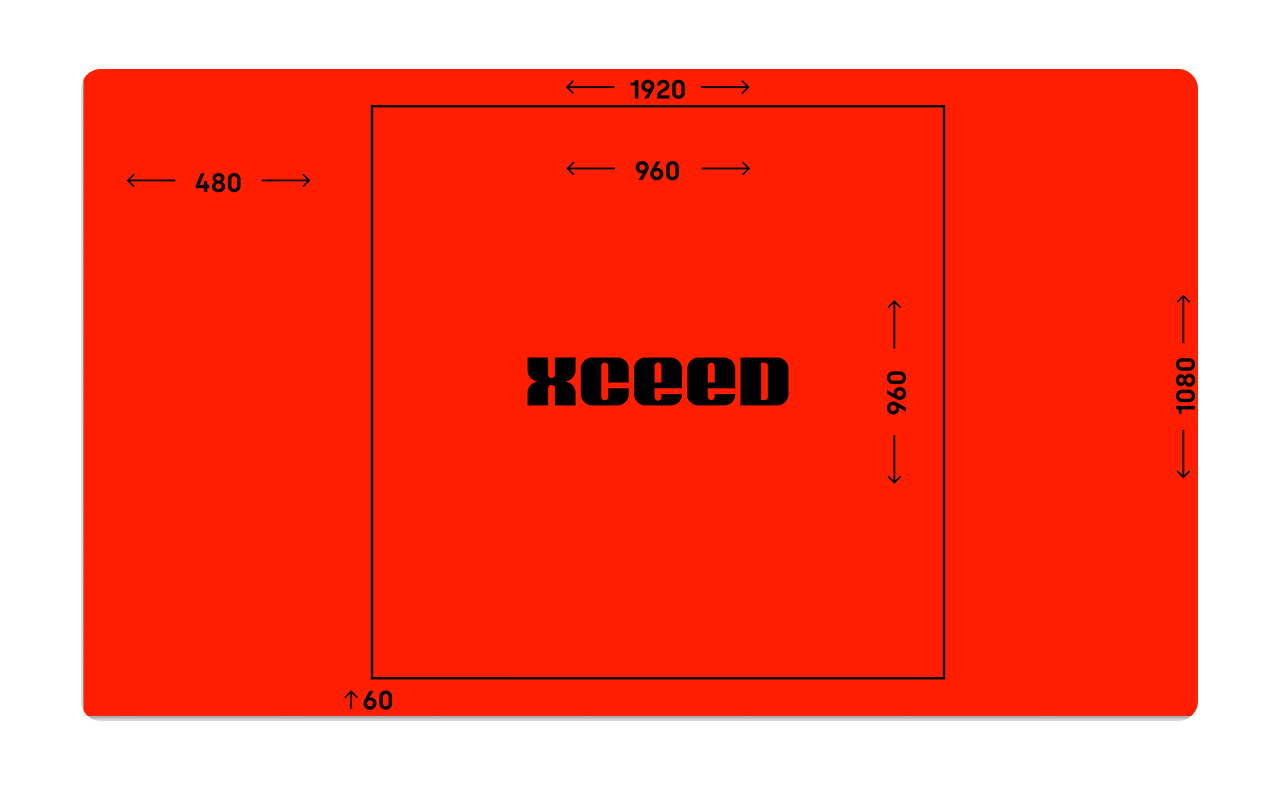
1.3.1 Image/video: Upload a high-quality image/ video
960 × 960 px recommended
1920 × 1080 px can also be used
This image/video will be public on XCEED, so use a clean design with artist names and key information.
1.3.2 Event Description:Add the event description in the available languages: English, Spanish, French, Italian, Portuguese, German and Catalan. English is strongly recommended for international audiences. Use this space to explain what makes your event worth attending.
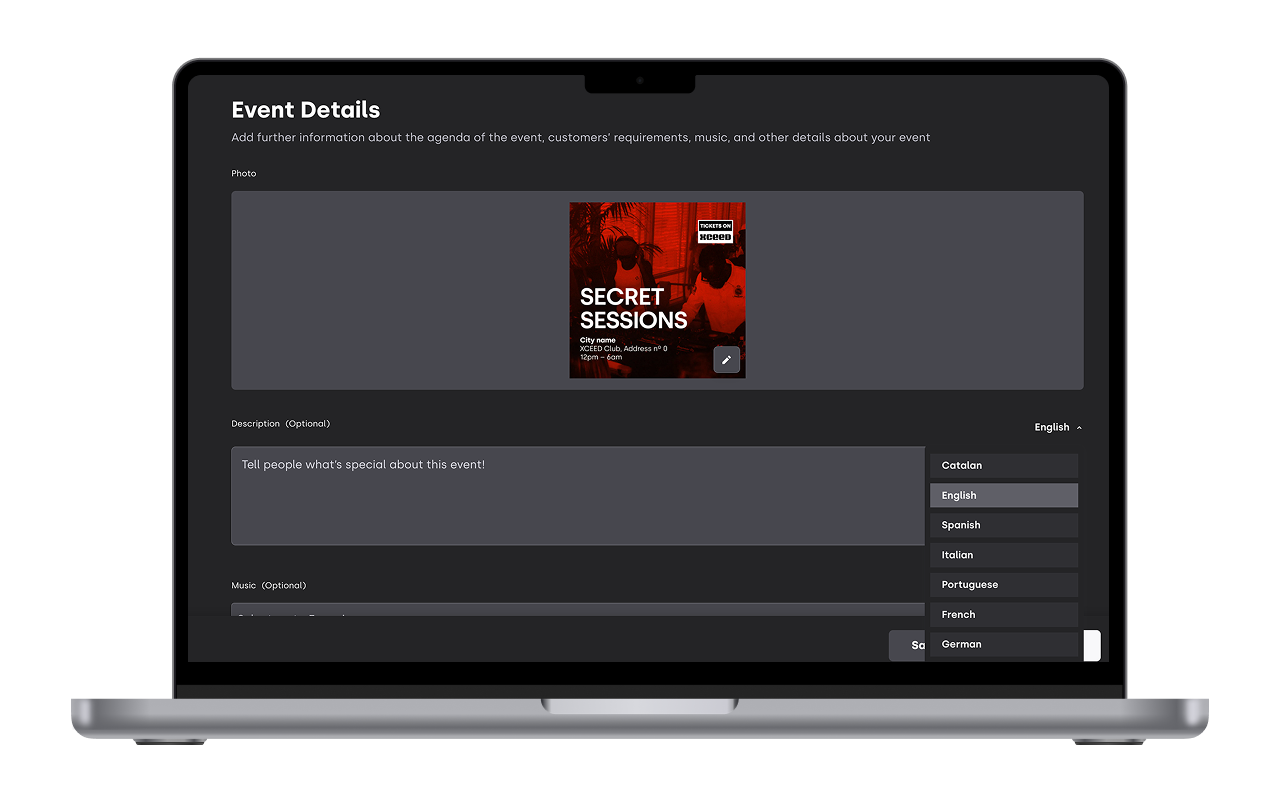
1.4 Additional event settings
Configure the rest of the event details:
Music genres
Vibe
Artists
Dress Code
Age
Opening hours
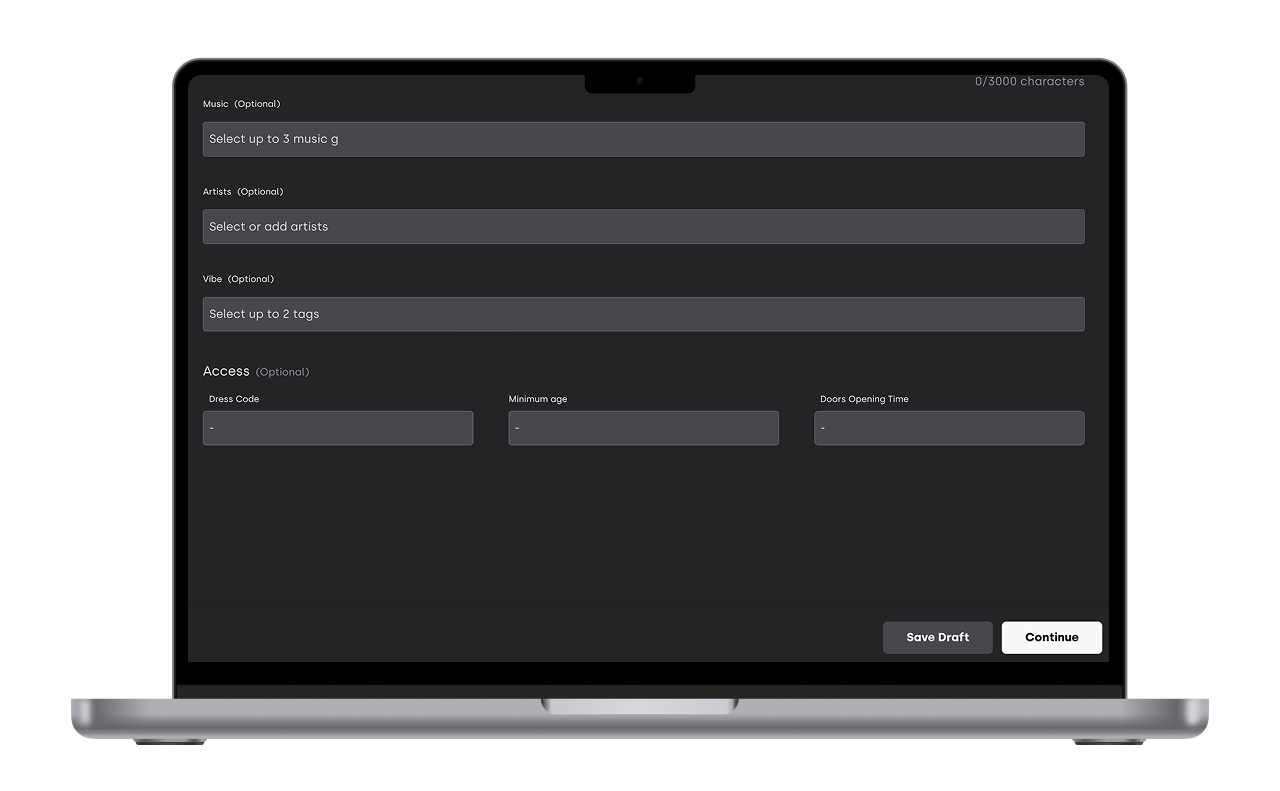
Click Continue once everything is completed.
2. Add your sales products (offers)
Add offers to you event on the Offer tab by clicking on create admission
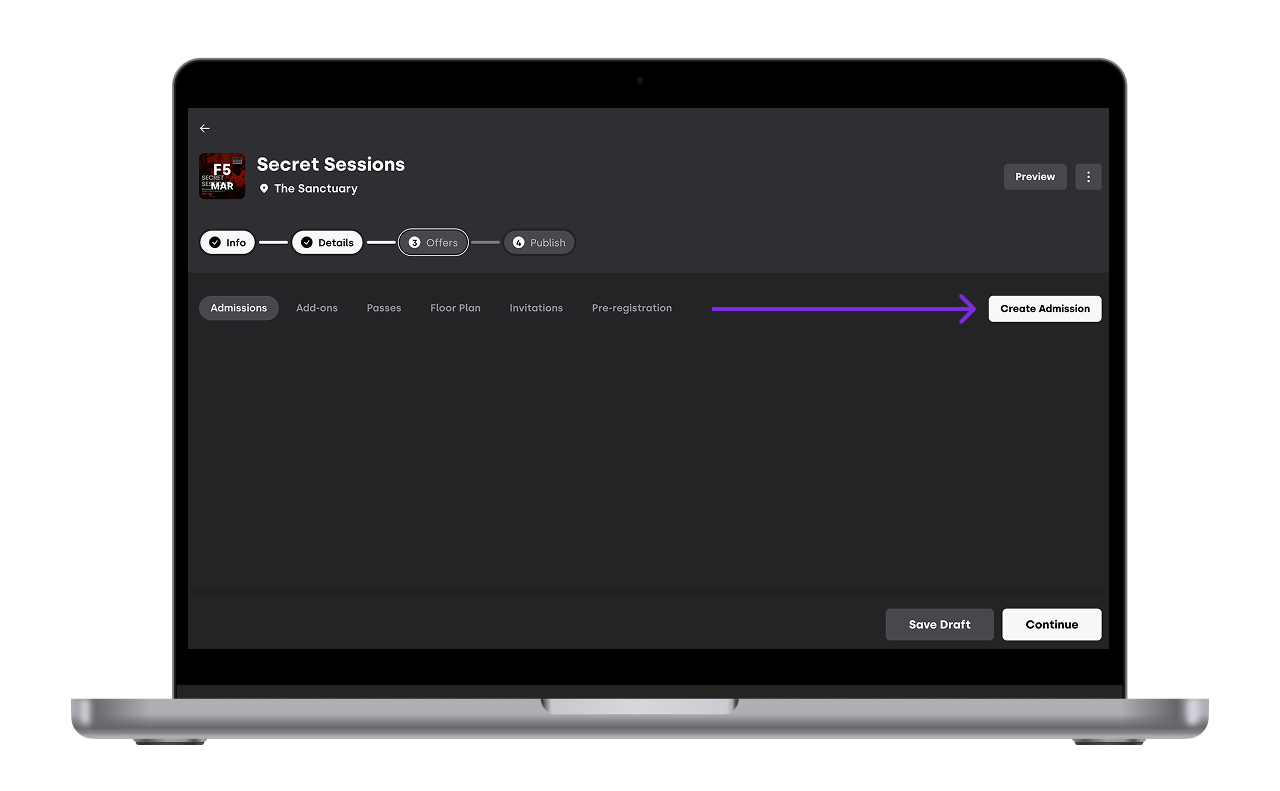
2.1 - Types of Offers
You can sell your event using three types of offers:
Guest List
Tickets
Bottle Service
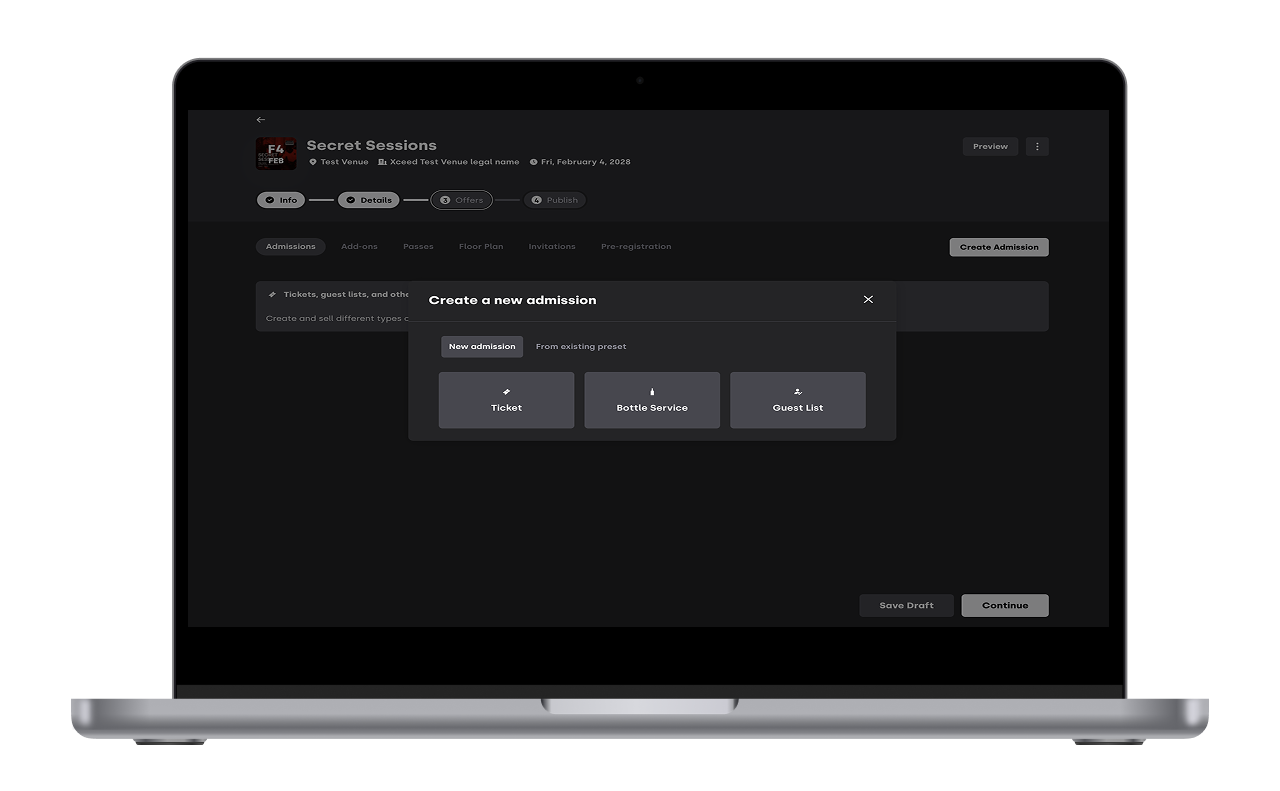
You can create them from scratch every time or use preset options you might have already created. See here how to create presets here
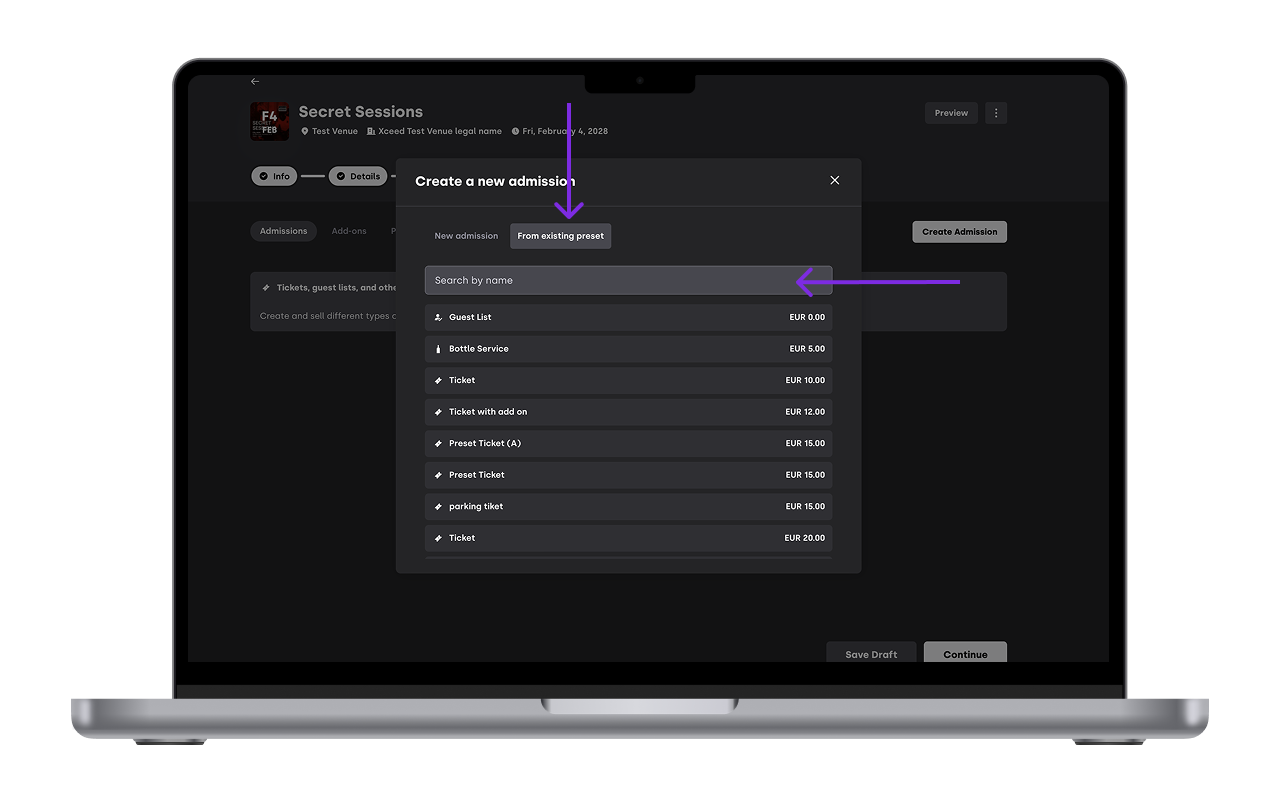
2.1.1 Tickets
2.1.1.1 Basic Information
Set ticket name, price, quantity, sales start and end time and add a description of what is included.
Tip1: Set up different sales start and end time using triggers (see more here)
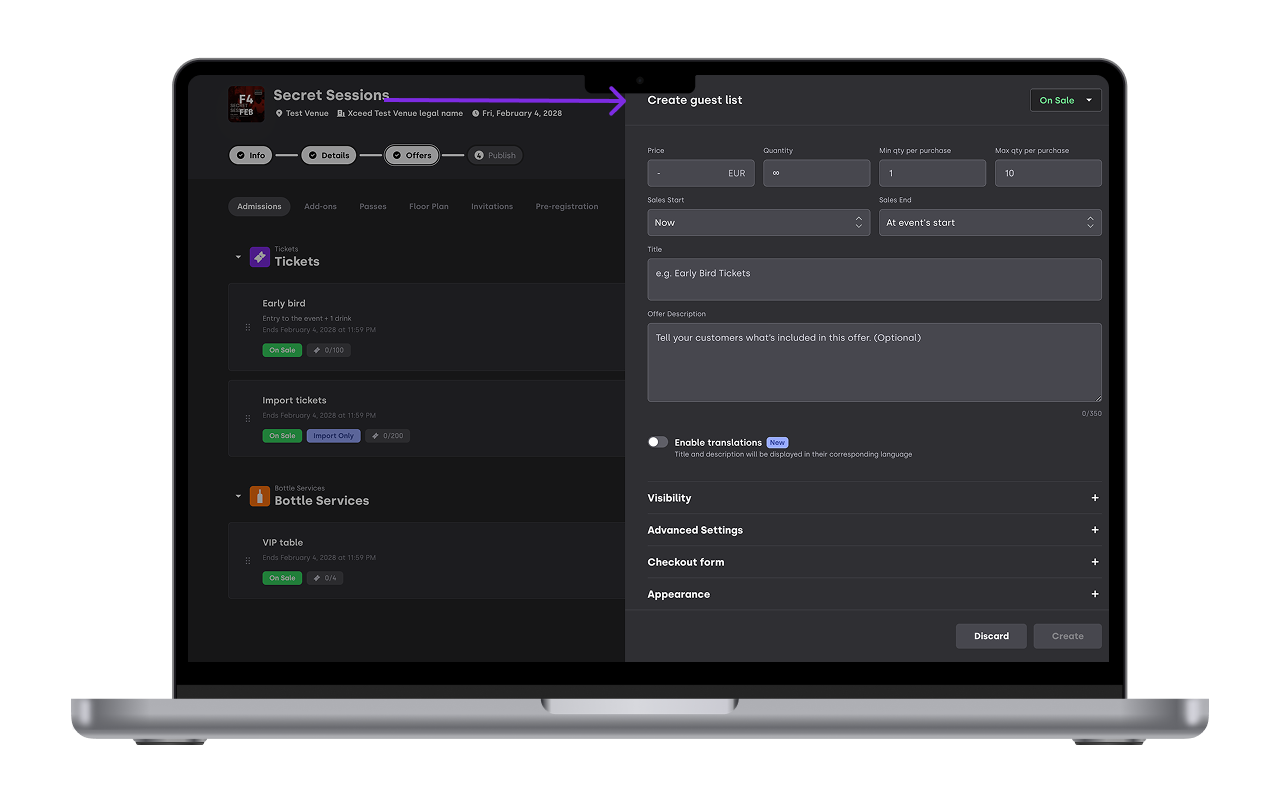
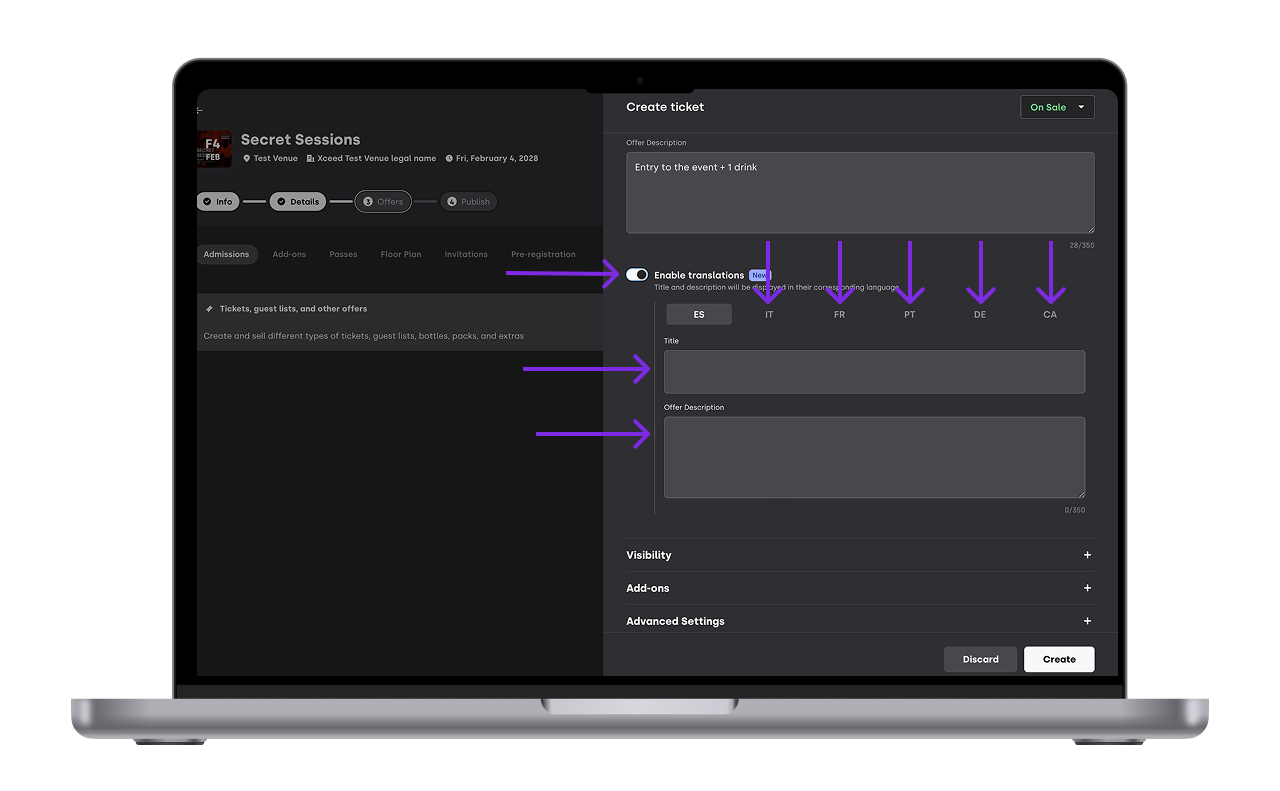
You can also enable translations so that your client see your ticket name and description in all the languages you fill it in (Spanish, Italian, French, Portuguese, German and Catalan)
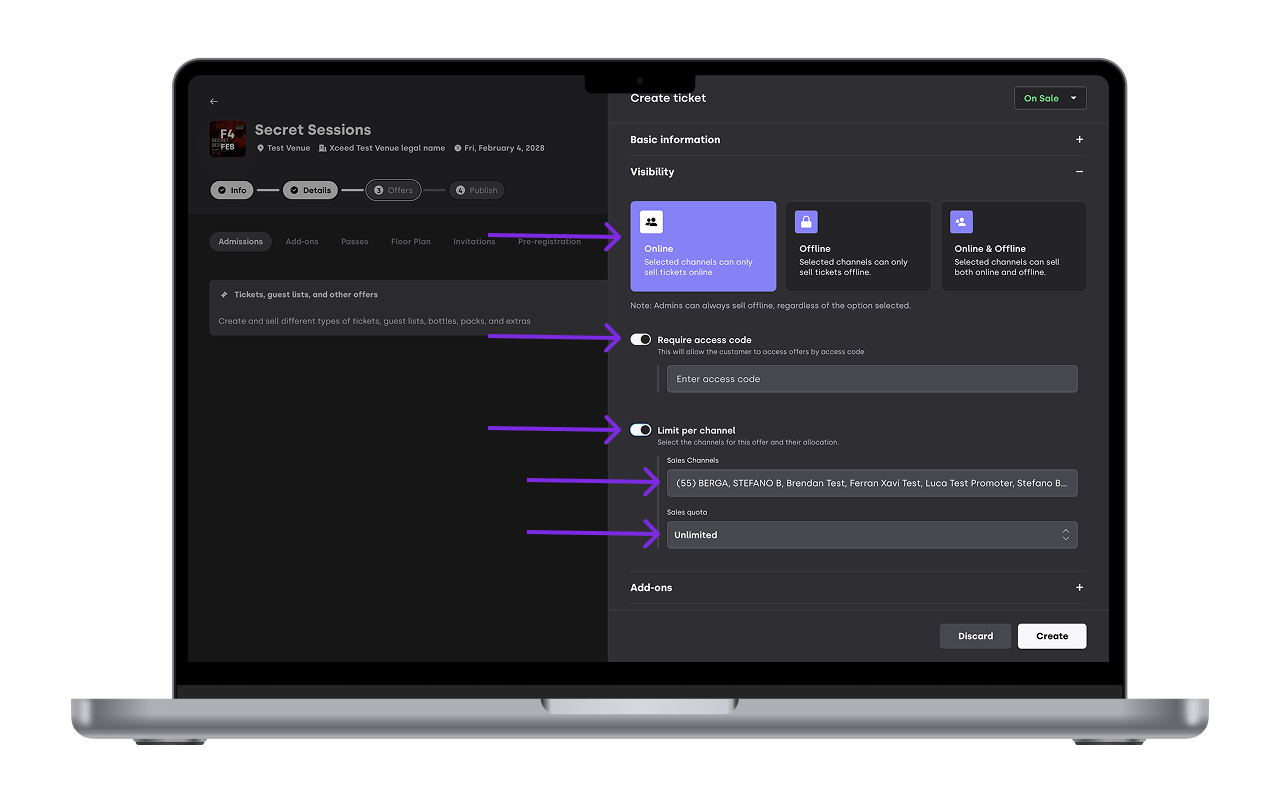
2.1.1.2 - Visibility
Decide who can sell your offer and how. By default all your sales channels can sell online. You can create offers only accessible in some channels with our without and access code.
Offline sales channel can import tickets sol in other platforms or other events
Online and Offline sales allow your sales channels to sell normally online but also at the box office, walk-ins or generally offline
2.1.1.3 Add-ons
Use the add-ons section to sell complementary products to your tickets. Learn more on how to create add-ons here
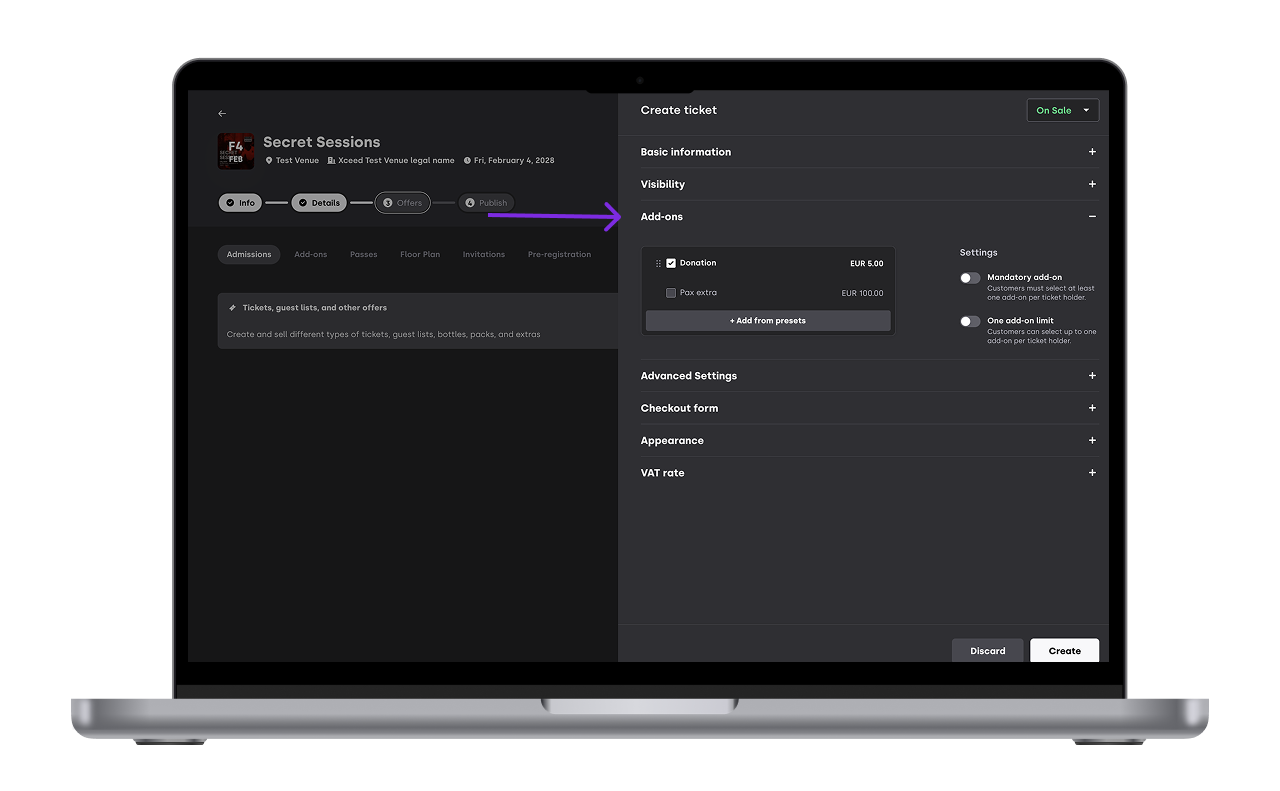
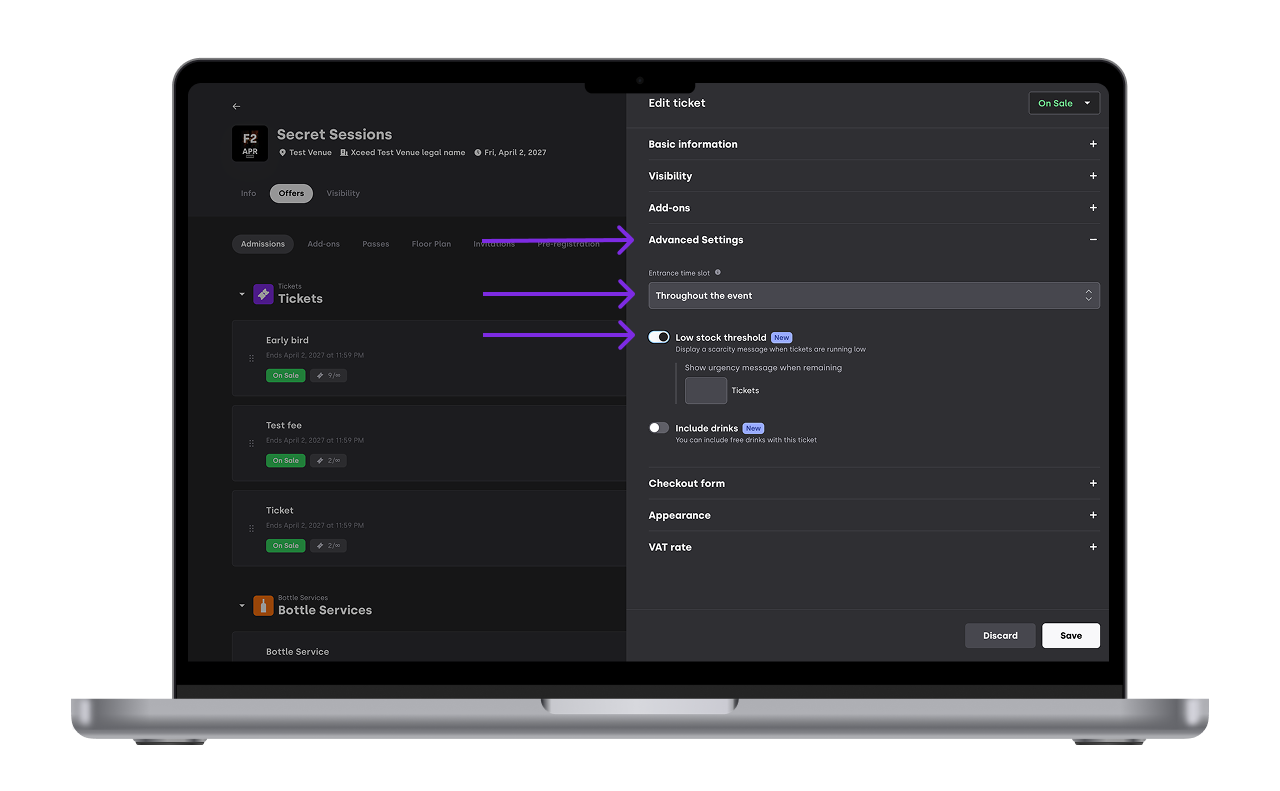
2.1.1.4 Advanced settings
Advanced setting include giving your offers a certain validity (they are by default valid throughtout the whole event), deciding when the low ticket threshold starts
2.1.1.5 Check-out form
At the check out form you can decide if your tickets are nominative and what kind of information you want to collect from your clients. All fields can be set as required or optional and more fields can be created
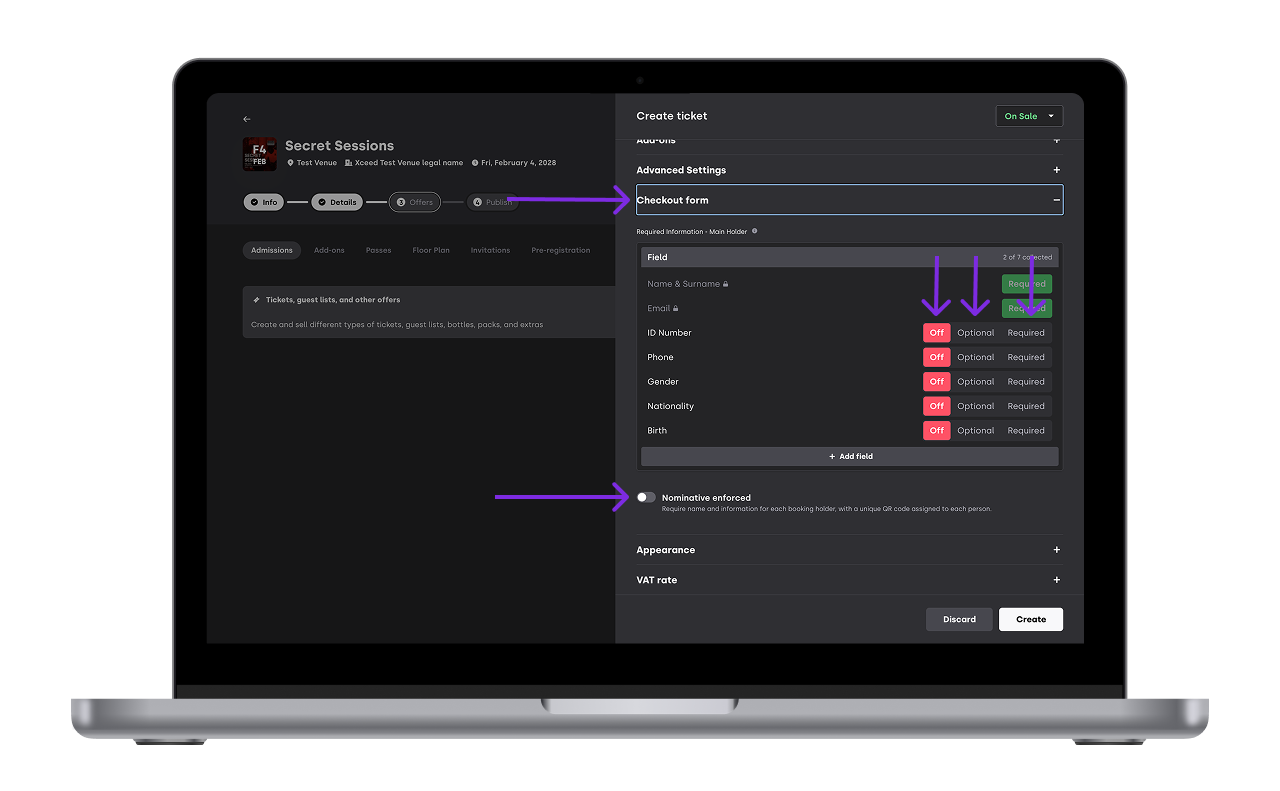
There are 2 types of tickets:
Transferable tickets: Unique QR codes but only the name and info of the buyer is recorded. This is enabled by default on XCEED.
Nominative tickets: Besides unique QR codes, each ticket inside a booking has the personal details of the event goers not only form the buyer.
Remember: The faster the purchasing process the higher the conversions so only request extra information or nominative tickets if you really need this
2.1.1.6 Appearance
Decide what colour you want your ticket to have on your event page
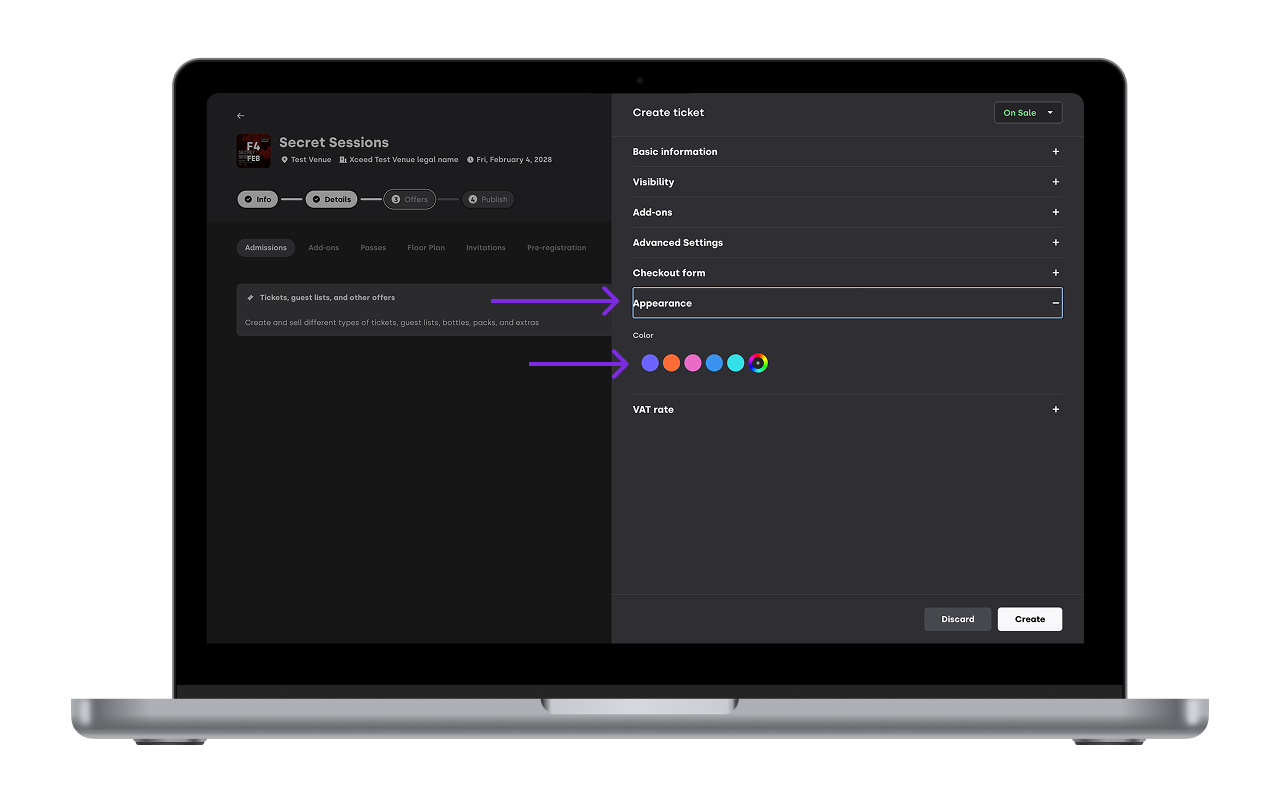
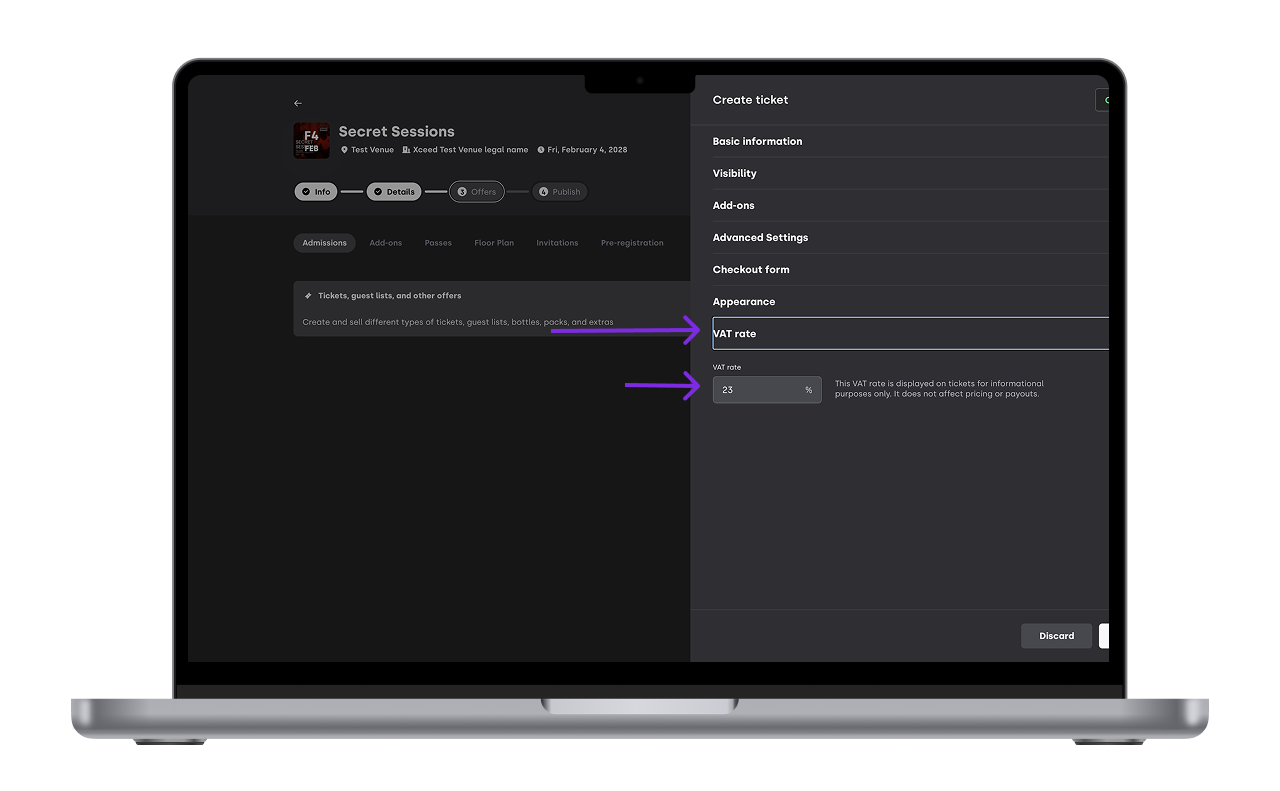
2.1.1.7 VAT
Set the VAT percentage applied on the ticket and have it shown on the PDF of your client
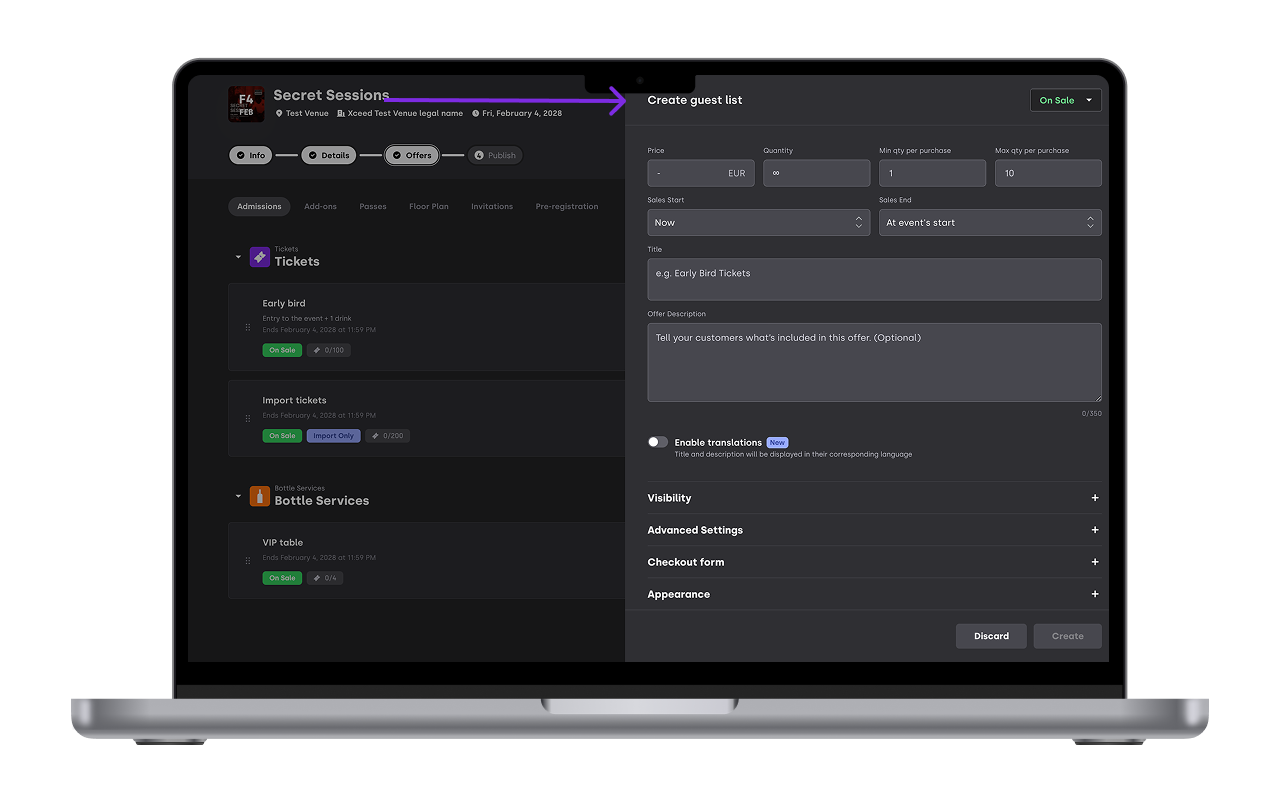
2.1.2 Guest List
Create a guest list that users can subscribe to. You can add a price to be paid at the door and include a description.
2.1.3 Bottle Service
Use this option to sell tables or bottle services. All set up is very similar to tickets except you have to define how many people can access each table.
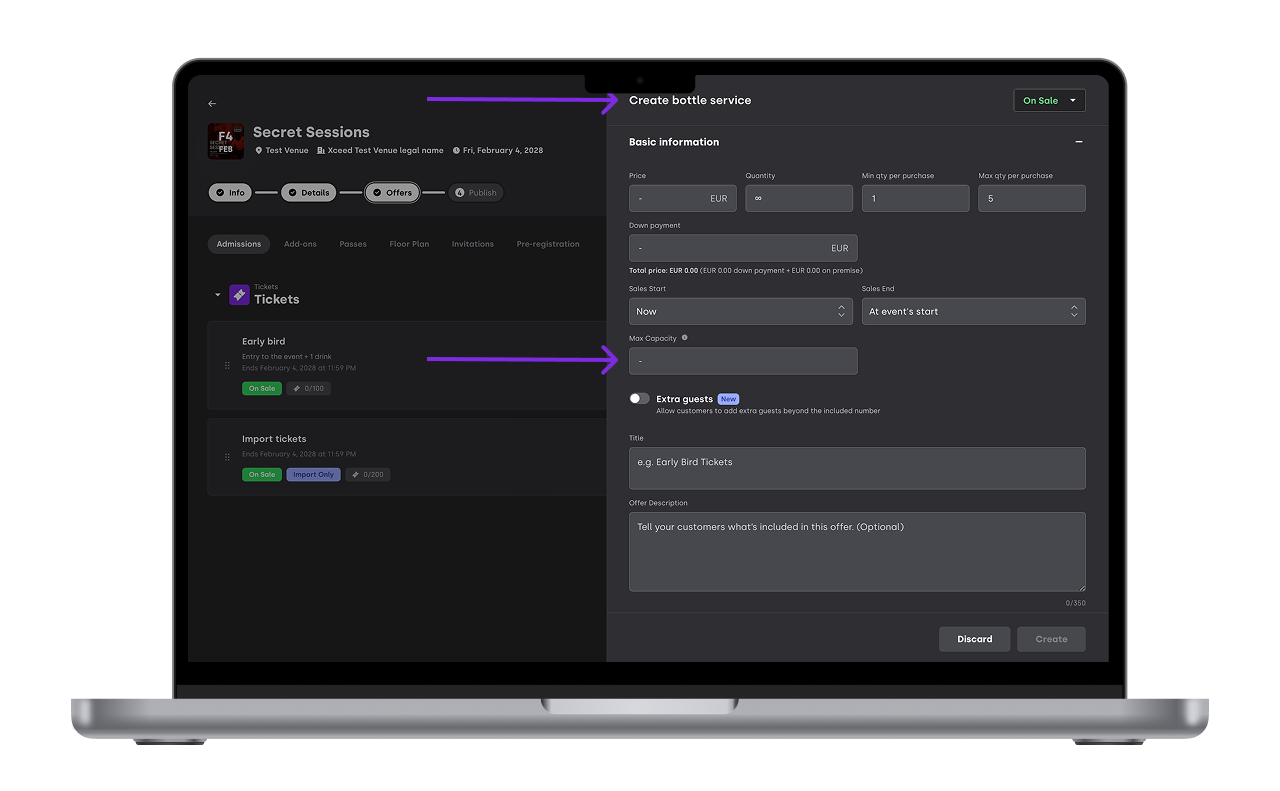
Max capacity: define how many people can access each table. The platform will generate as many QR codes as the table capacity so each person has their own unique ticket to go into the event
Extra Guest: Allow your guests to add people to their table at a certain price per person. Define the maximum number of guests that they can add
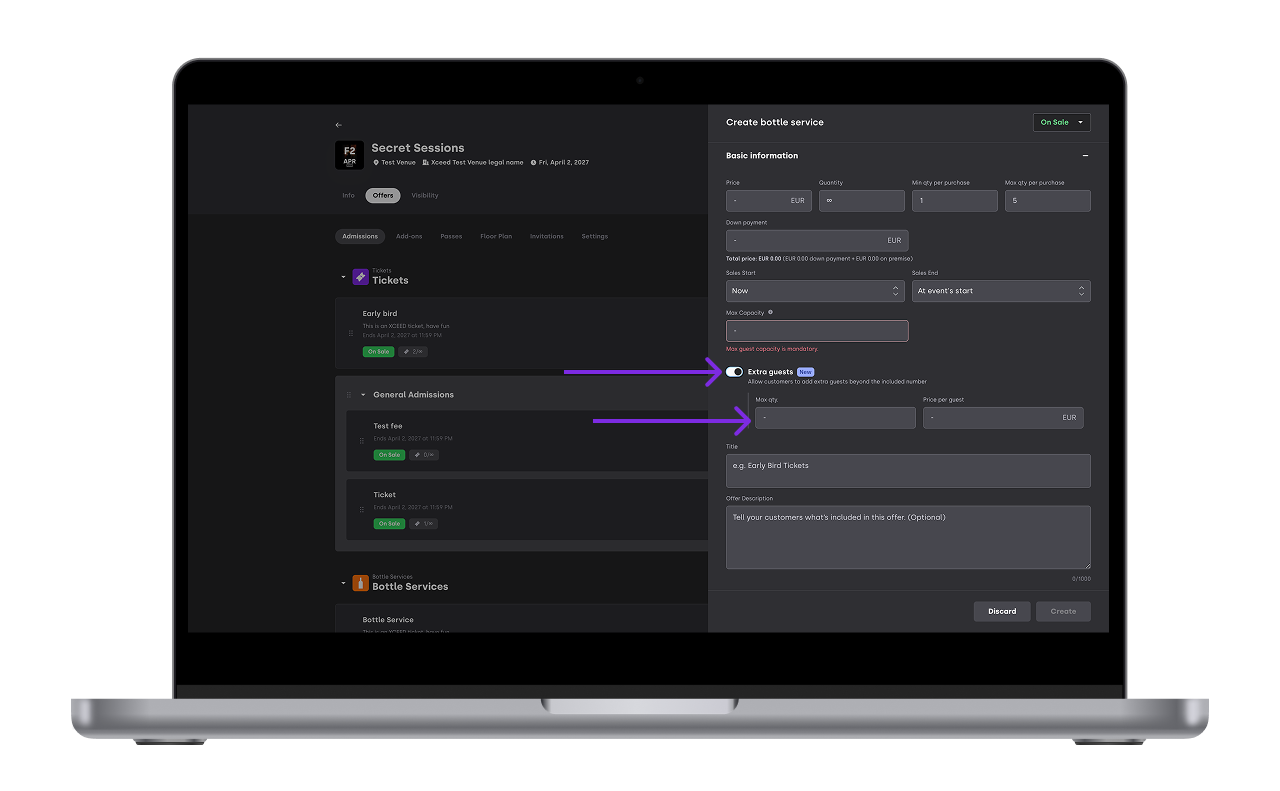
You can also attach a floor plan to show how your tables are set up (see more here for a simple floor plan or here for an interactive one) or define down payments for high priced tables (see more here).
2.2 Offers on sale for general public
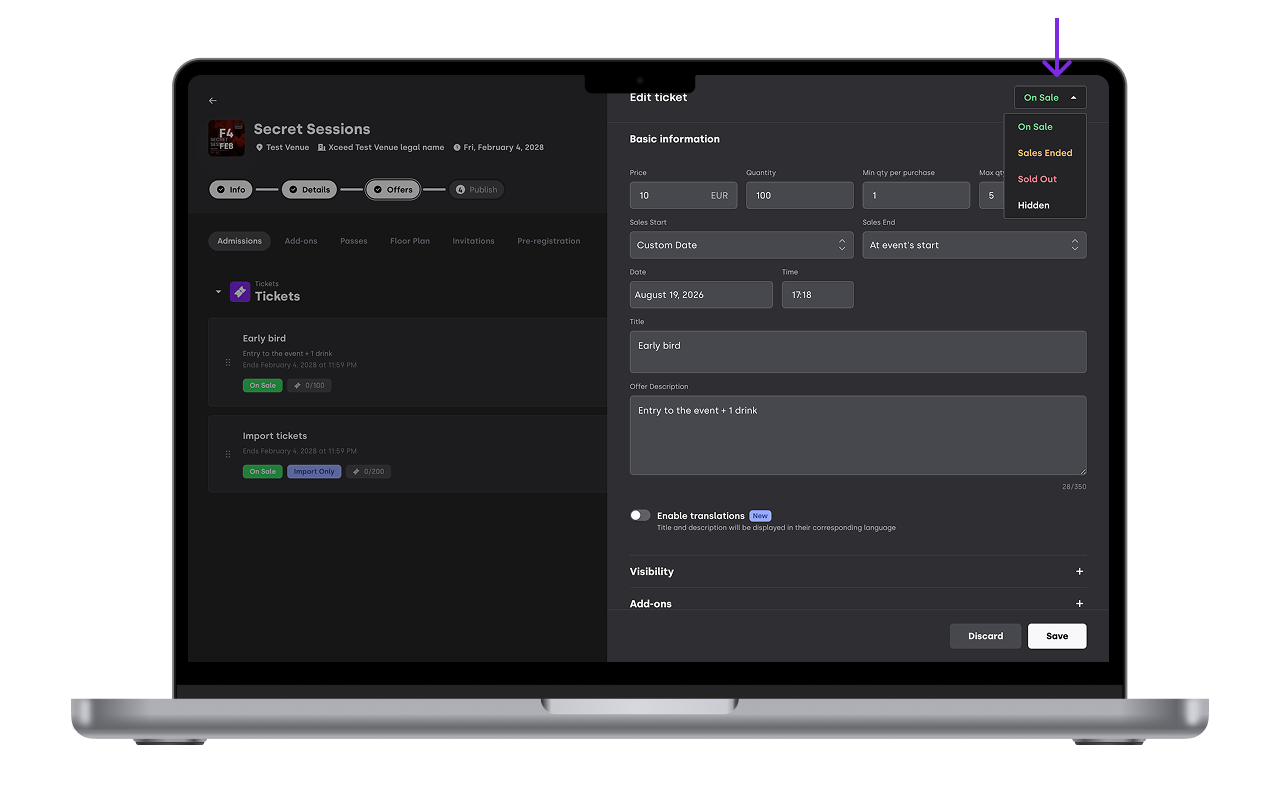
If an offer is set to On Sale and Online, it will appear in the event link, your website (in case you have our Widget installed) and any promoter-sales channel link.
You can manually change the status of an offer at any point:
Sales ended - Appears on your event page but not available for purchase as time to buy them has passed
Sold out - Appears on your event page but not available for purchase as all quantities have been sold already
Hidden - Doesn't appear on your event page
2.3 Offers order
You can reorder your offers at any time:
Click Edit
Go to Offers
Drag and rearrange the offers as needed
You can change the order of individual offers or the section and group. See more here
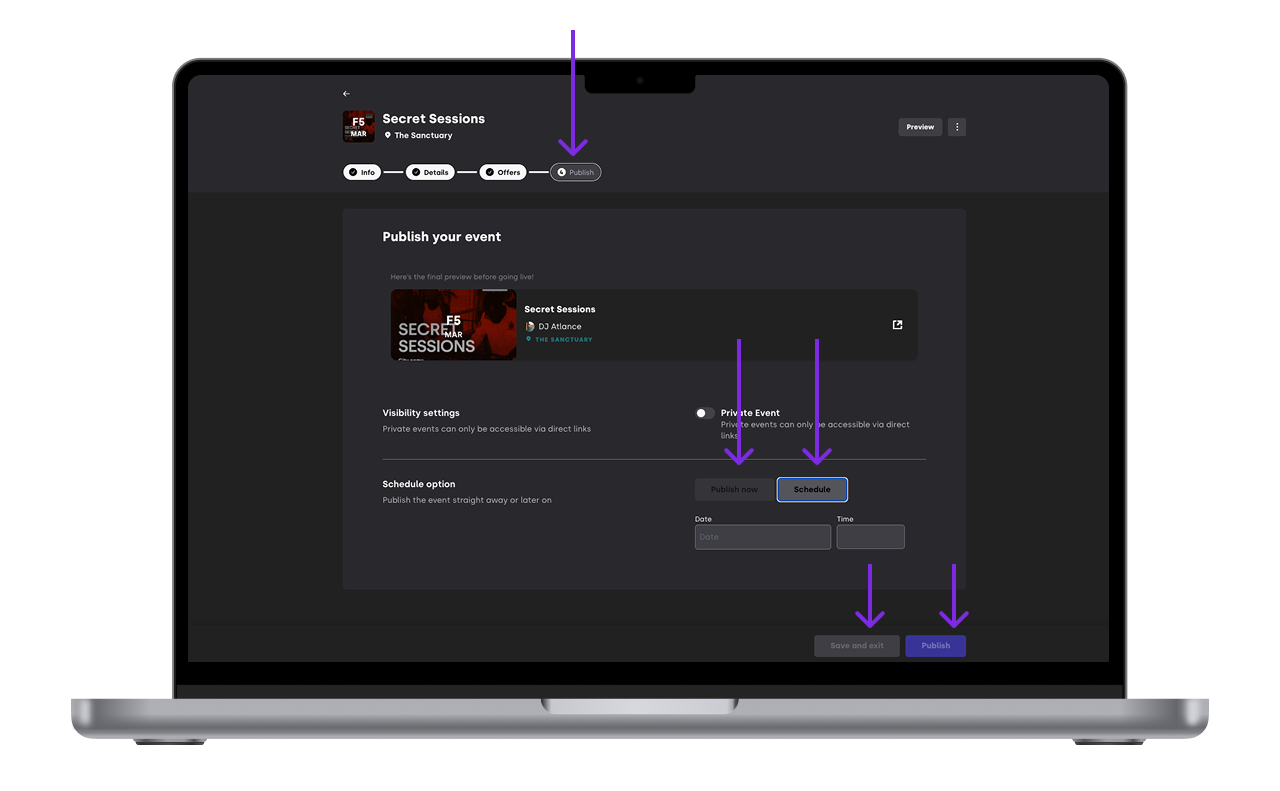
3. Publish your event
You can:
Save the event as a draft to publish later
Publish immediately
Schedule it for a later date and time
Once published, your event is live and ready to sell.
If you set your event as private it will be on sale but only with direct links to it. It will not appear on the XCEED market place or on your general (all-events) promotor channels
4. What your clients receive
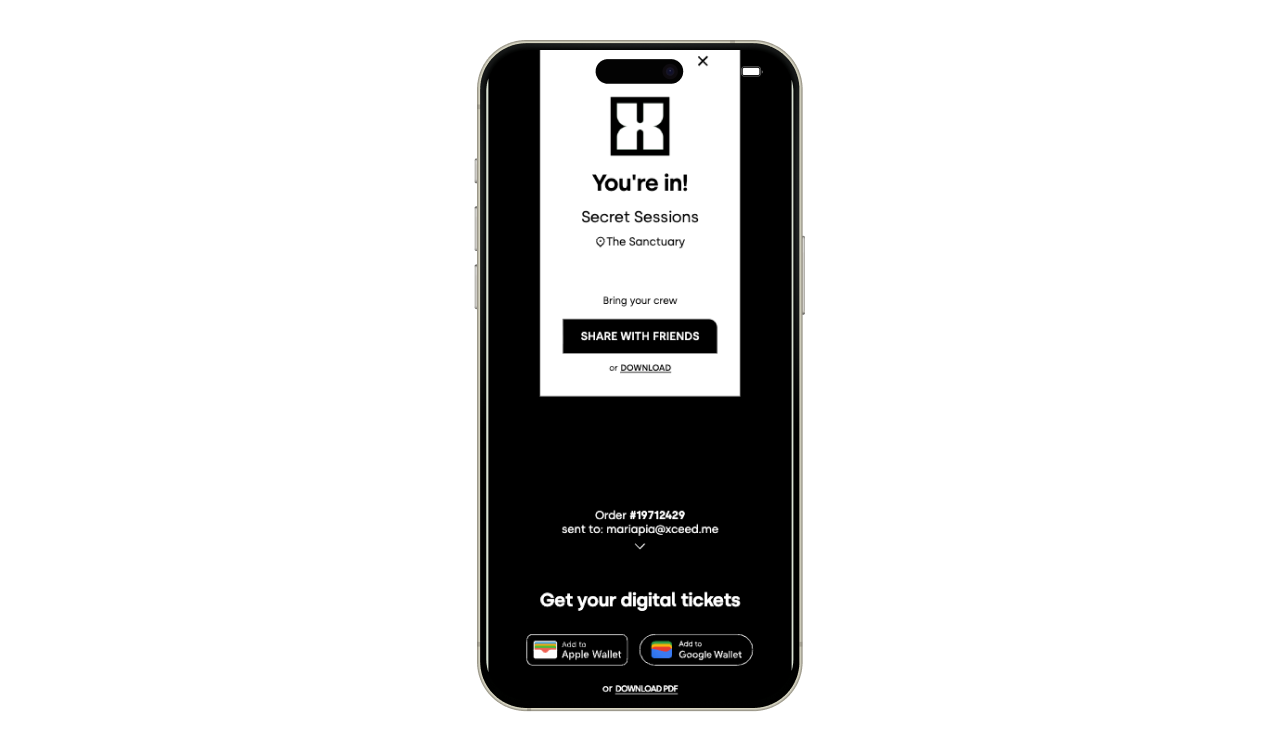
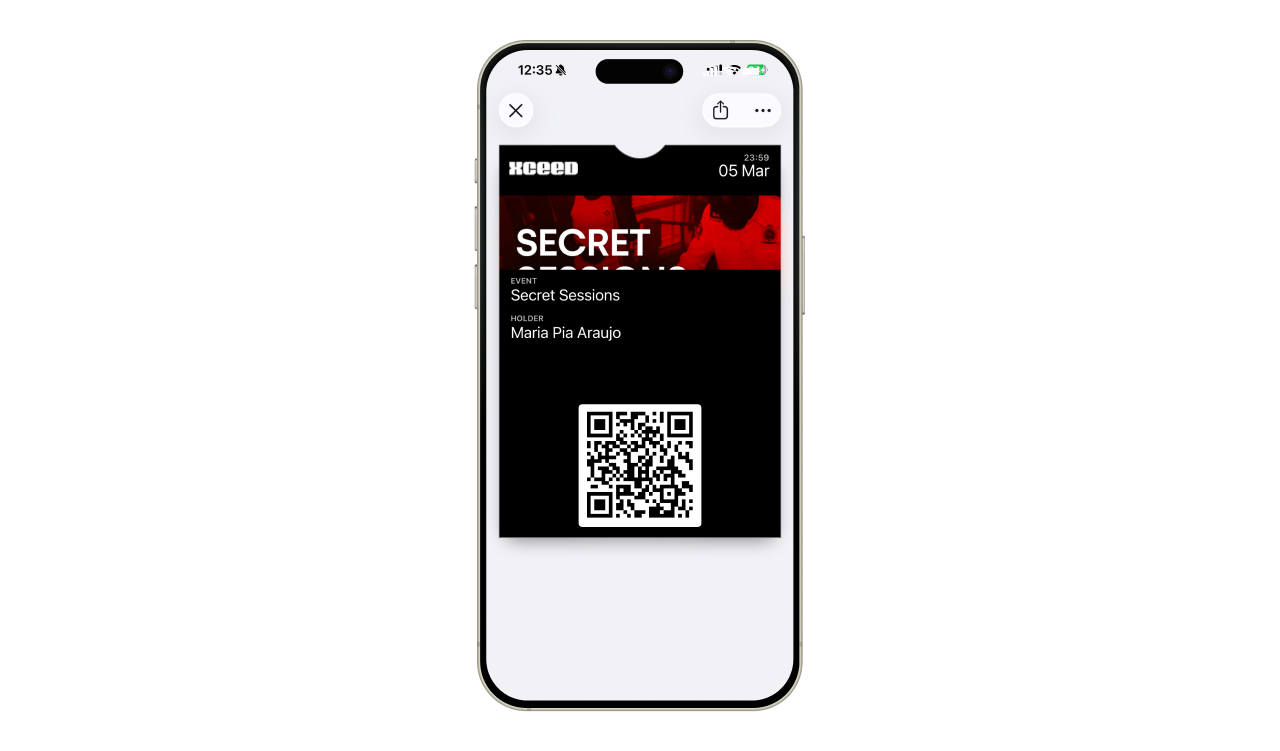
After completing payment, customers receive:
A success confirmation page
An email with the ticket PDF
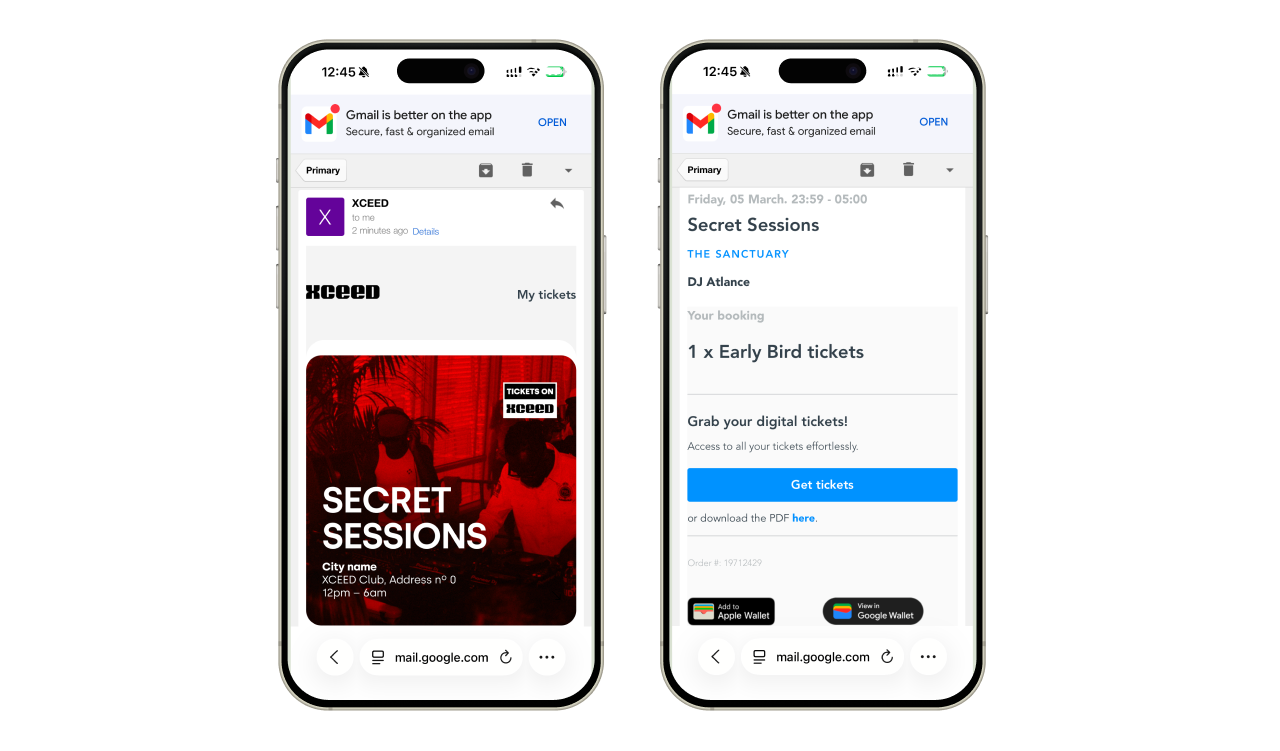
The option to add tickets to Apple Wallet or Google Wallet

5. Check in clients at the door
Using XCEED Access, staff can scan tickets (Check how to use it here)
If you plan on using any other checking software you can also download all the QR codes in a CSV. format to import.
Your are all set up and ready for a successful event.
If you have any other questions check our FAQ page or contact support@xceed.me